
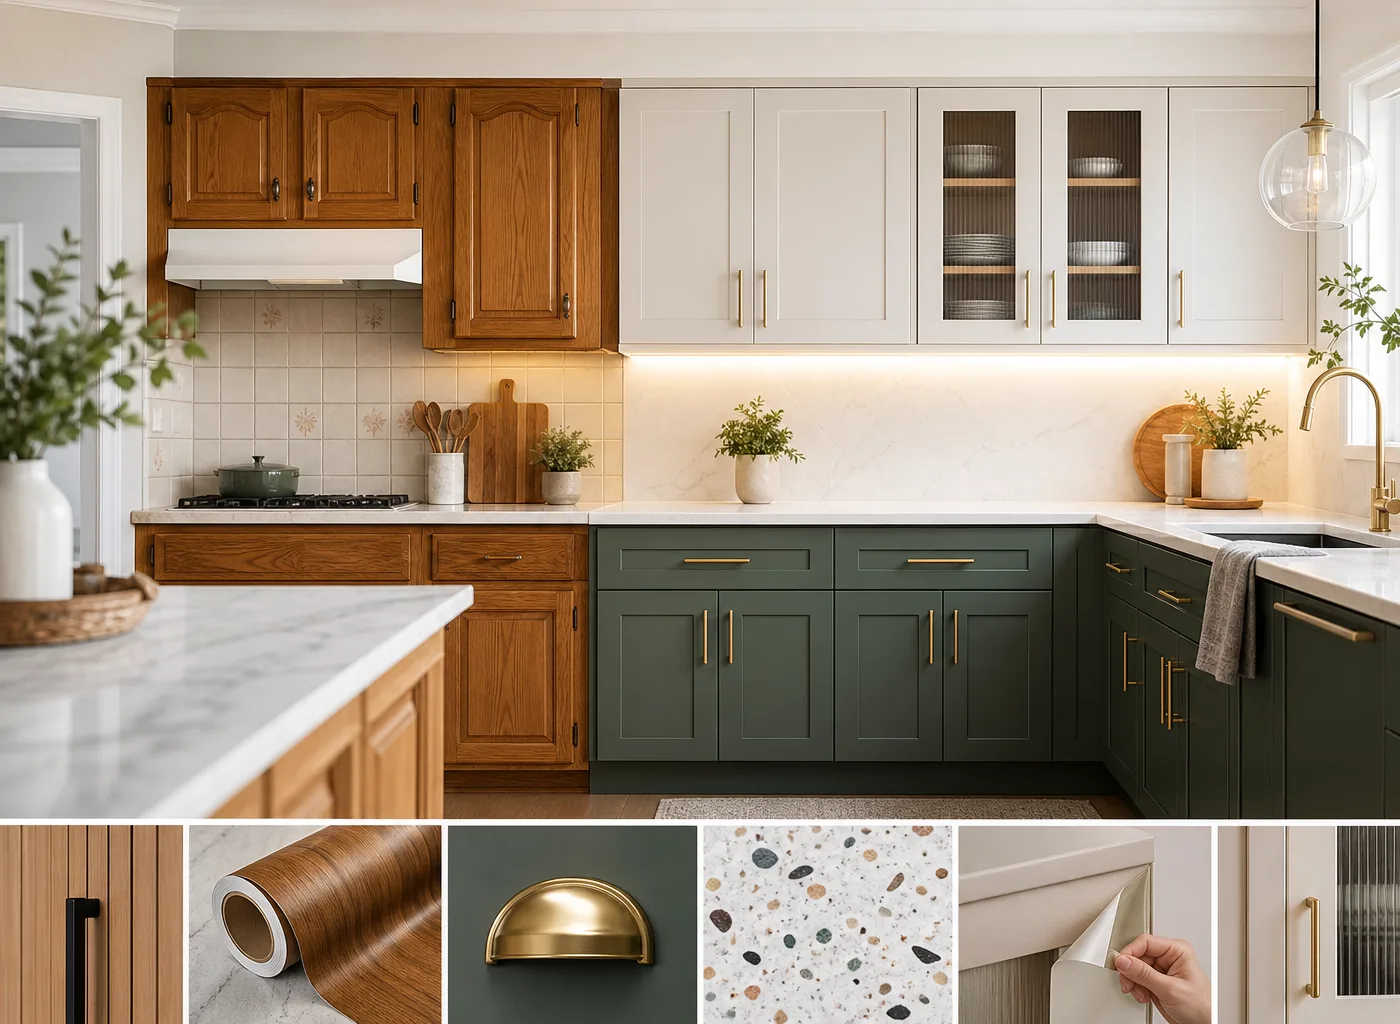
A kitchen cabinet makeover without painting is one of the smartest ways to refresh a dated kitchen while avoiding the time, mess, cost, and permanence of a full refinishing project. Whether your cabinets are solid wood, laminate, thermofoil, or a rental-grade finish, you can make them look more current with targeted upgrades that emphasize their best features and downplay what feels tired.
The key is to think beyond cabinet color. Hardware, lighting, surrounding finishes, door details, and thoughtful styling all influence how cabinetry reads in a room. A few coordinated changes can make existing cabinets feel intentional rather than outdated—and many of them are DIY-friendly or reversible for renters.
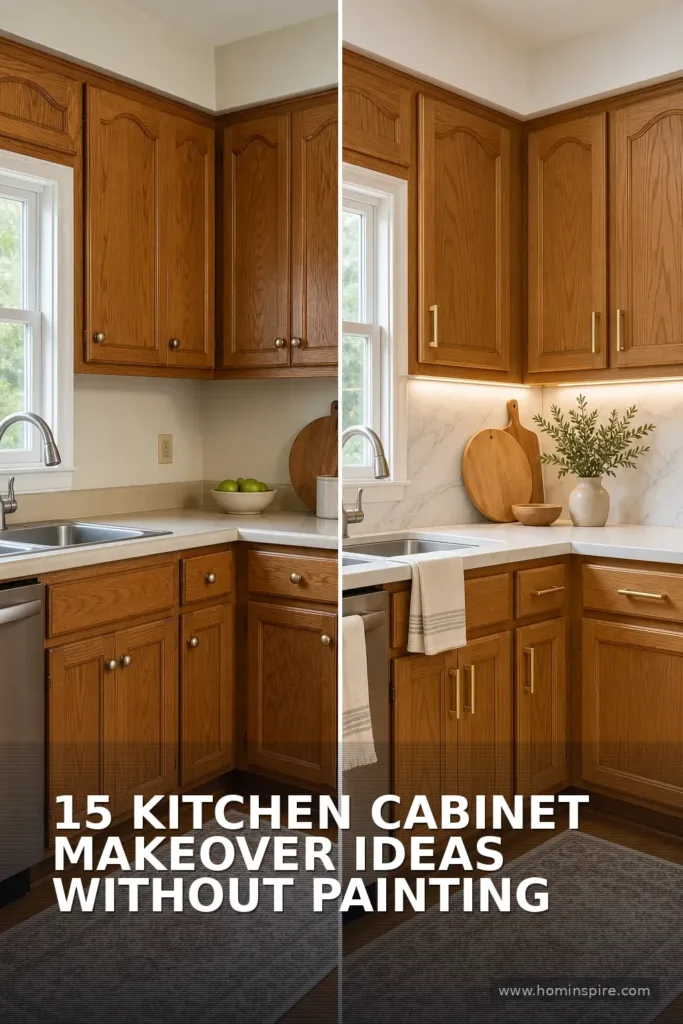
Use the ideas below to build a plan that fits your budget, cabinet material, and long-term goals.
Start With a Deep Clean and Small Repairs
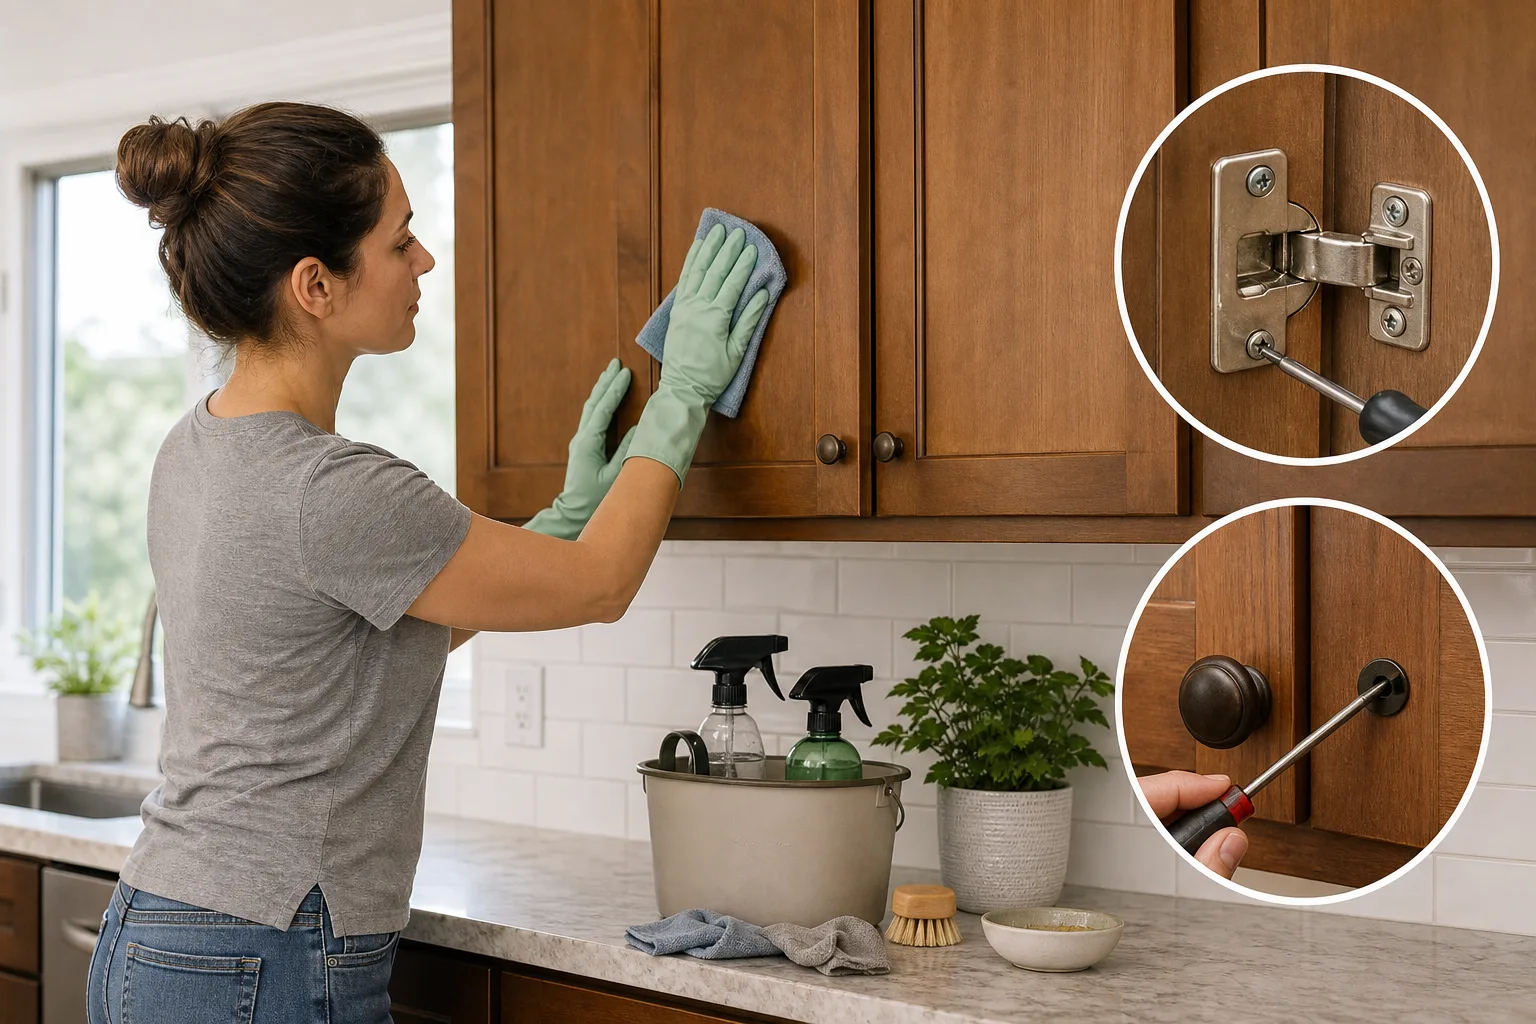
Before buying anything, clean every cabinet door, drawer front, and frame thoroughly. Cooking grease, hand oils, and dust can make wood look dull, laminate look yellowed, and white cabinets look grayer than they truly are. Use a degreasing cleaner appropriate for your cabinet finish, then dry the surfaces completely with a soft cloth.
Next, inspect the cabinets in daylight. Tighten loose hinges, adjust doors that hang unevenly, fill unused hardware holes if needed, and repair peeling edge banding or chipped veneer. These small fixes matter because a kitchen looks more polished when the lines between doors and drawers are even.
If you have older wood cabinetry, preserving its natural character may be more rewarding than covering it. Find more material-specific ideas in this guide to refreshing old wood kitchen cabinets.
1. Replace Cabinet Hardware for an Instant Upgrade
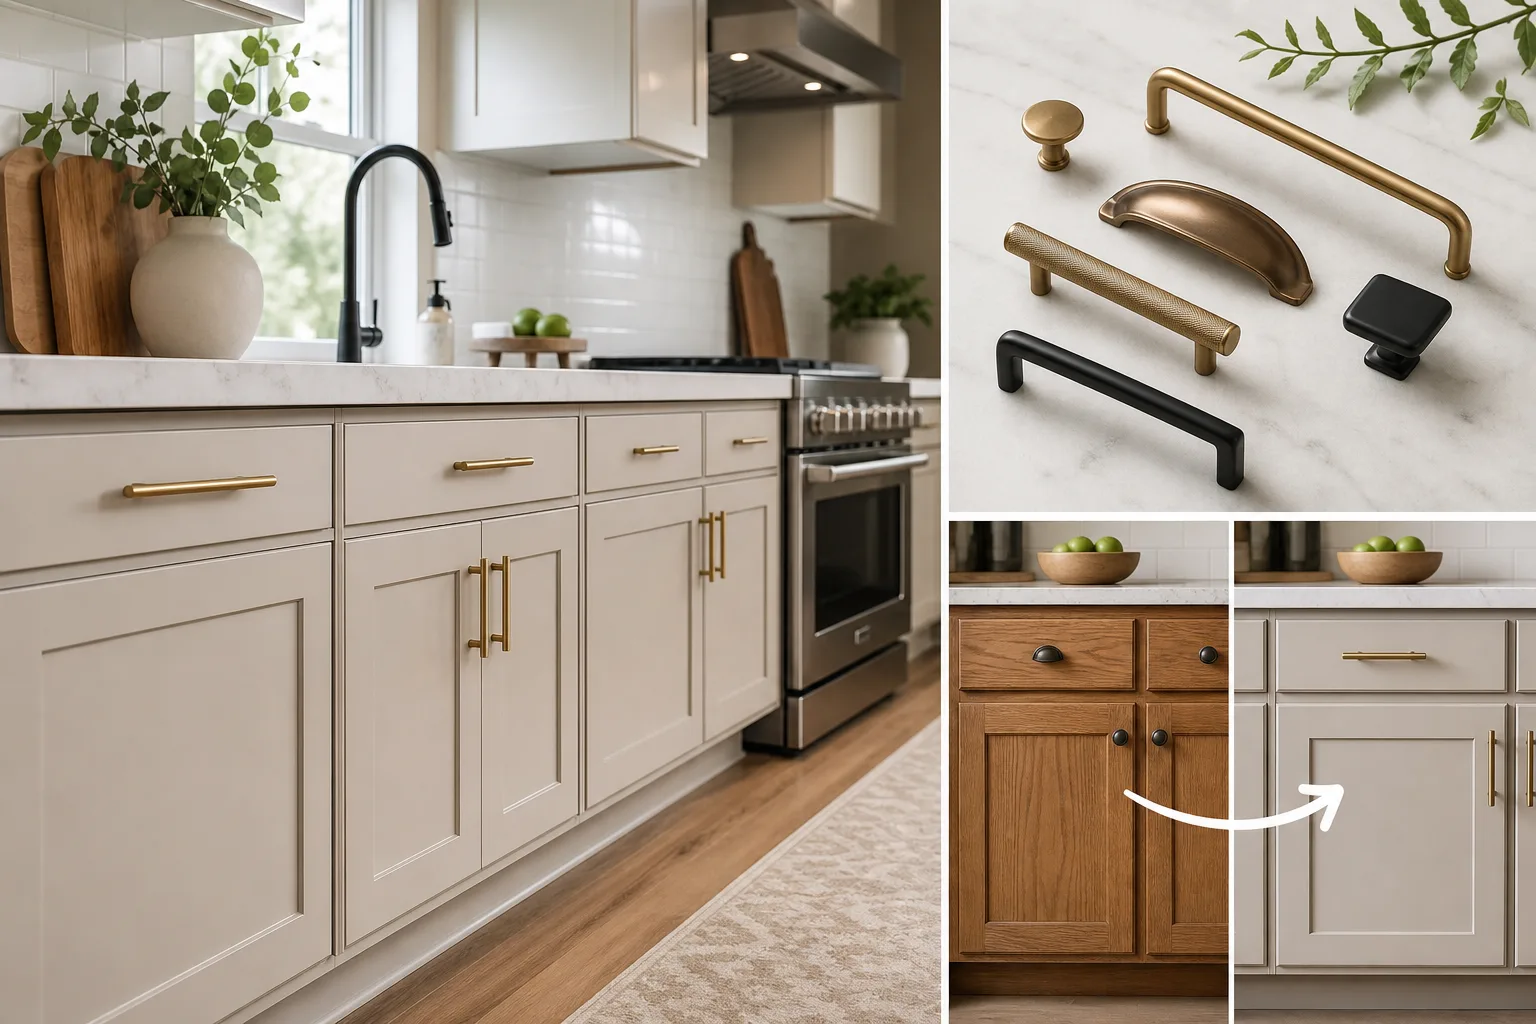
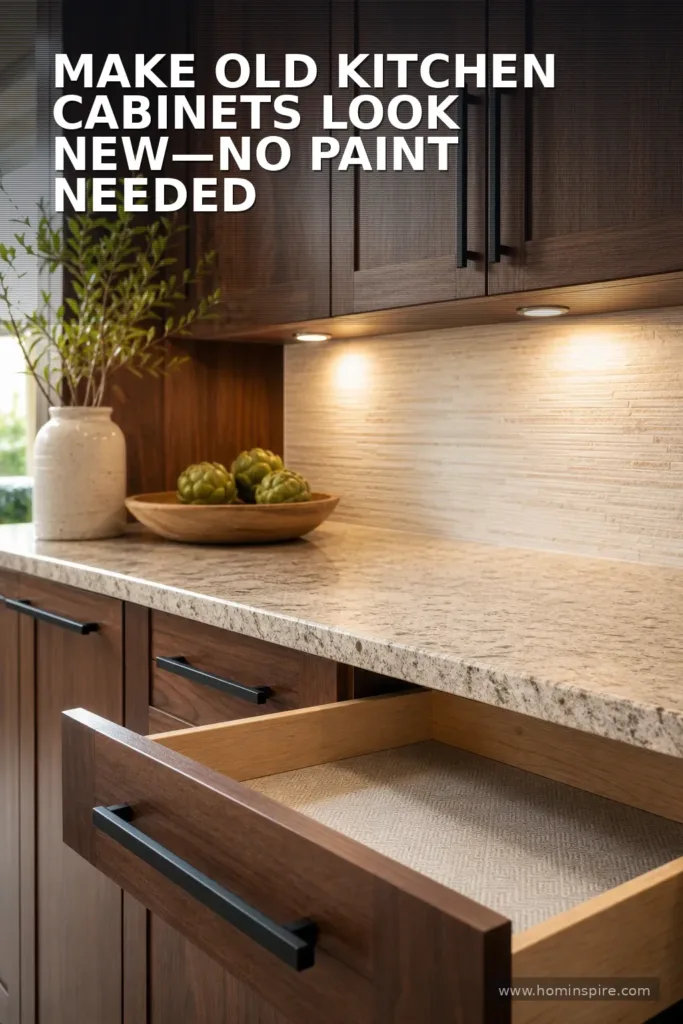
New knobs and pulls are usually the fastest, most noticeable cabinet update without paint. Hardware acts like jewelry for the kitchen: it adds contrast, defines the style, and makes old doors feel more deliberate.
For a clean contemporary look, choose slim bar pulls in brushed nickel, satin brass, matte black, or soft bronze. If your kitchen has traditional doors, cup pulls, mushroom knobs, and aged brass finishes add classic character. Matte black works well when repeated in lighting, faucet details, or open shelving brackets.
Measure the center-to-center spacing of existing pull holes before ordering. Selecting hardware with the same measurement lets you avoid drilling. If you want to switch from knobs to pulls or change the spacing, use a hardware jig for consistent placement and make sure old holes can be covered by the new backplates.
2. Add Under-Cabinet Lighting
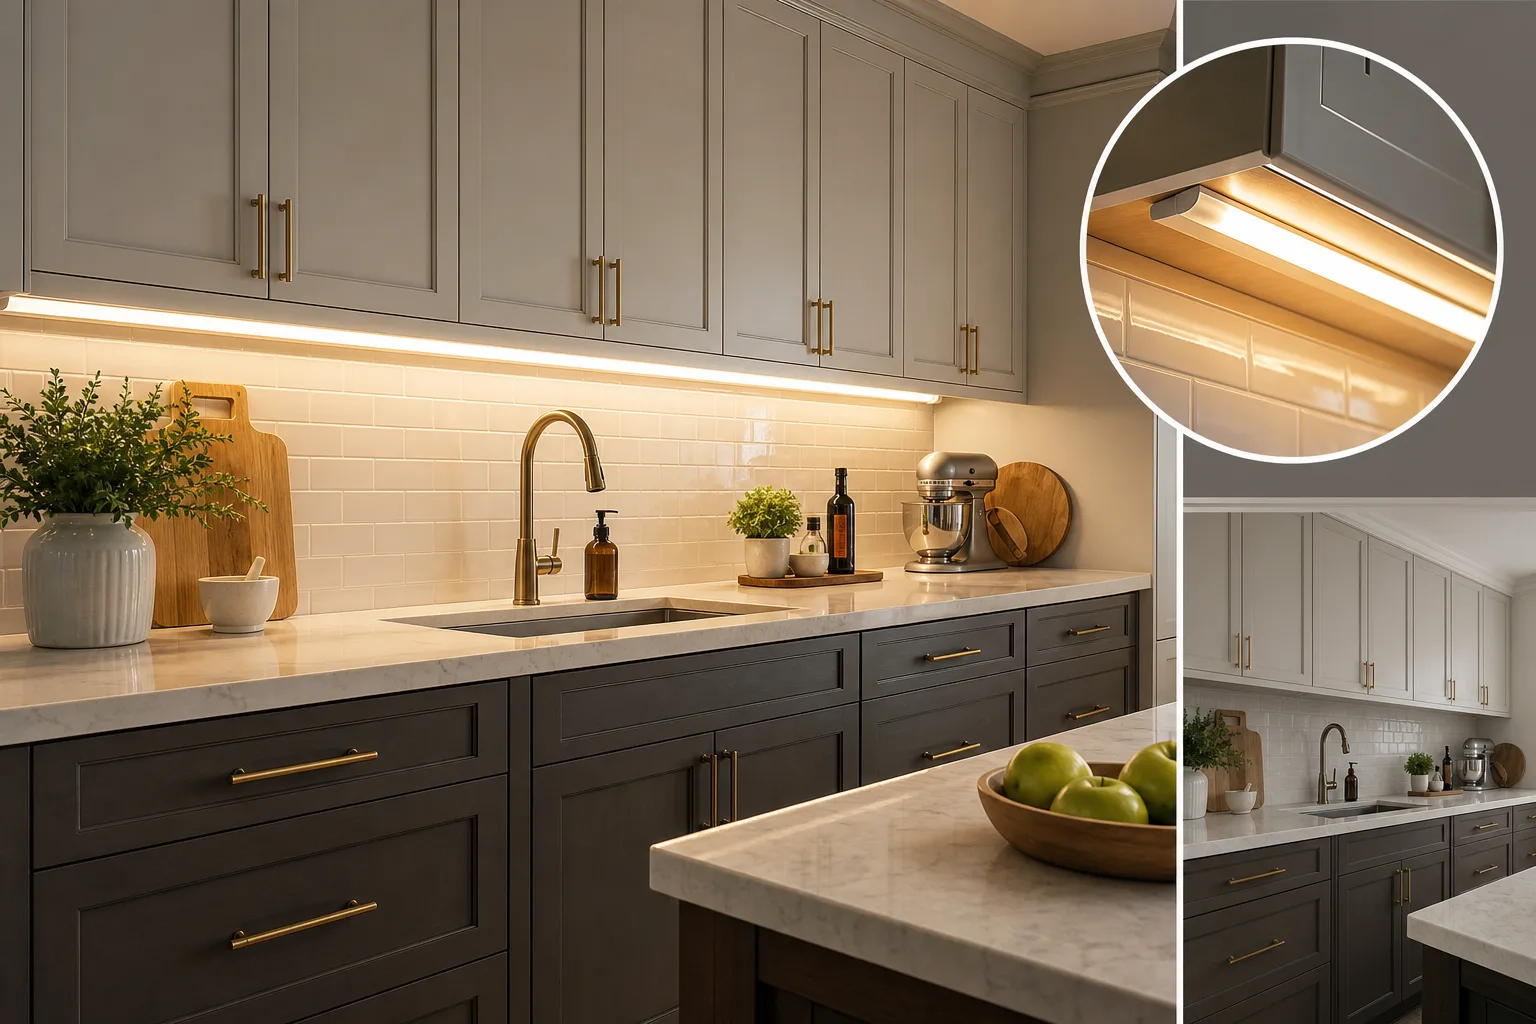
Lighting can change how cabinets look as much as any surface treatment. Under-cabinet LEDs brighten counters, reduce shadows, and make cabinetry appear more custom. They are especially effective with dark wood or deep-toned cabinets because they bring light to the work zone below.
Choose warm white LEDs, generally around 2700K to 3000K, for an inviting residential feel. Rechargeable puck lights are simple for renters, while plug-in LED strips offer a stronger, more continuous glow. Hardwired fixtures are the most seamless option if you are planning a longer-term update.
Place the lighting toward the front underside of the upper cabinet rather than against the wall. This positioning illuminates the full countertop and prevents a harsh shadow line near the cabinet face.
3. Upgrade or Cover Cabinet Hinges
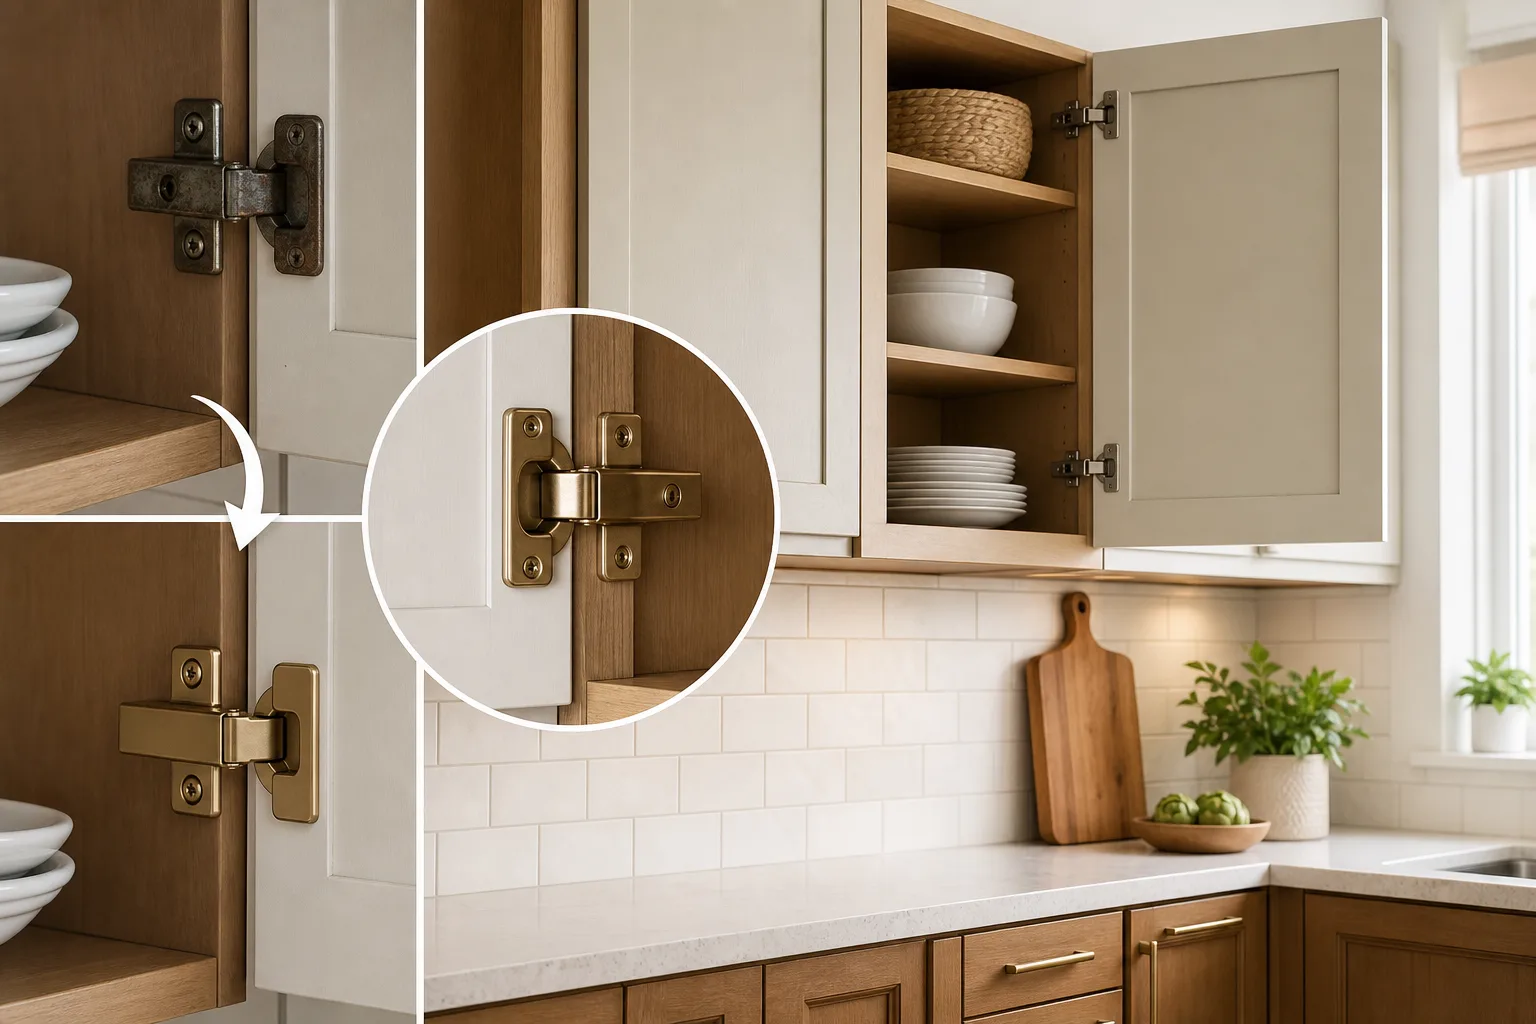
Exposed hinges can quietly date a kitchen. If your cabinets use visible brass hinges from another era, replacing them with a finish that matches your hardware can make a significant difference. Satin nickel and antique bronze are versatile choices for traditional kitchens, while matte black creates stronger definition.
When possible, bring one existing hinge to the hardware store or compare its exact dimensions before ordering replacements. Cabinet hinges are not always universal. If changing them feels too involved, clean and polish existing hardware first; removing built-up grime can improve their appearance more than expected.
4. Use Peel-and-Stick Cabinet Vinyl Strategically
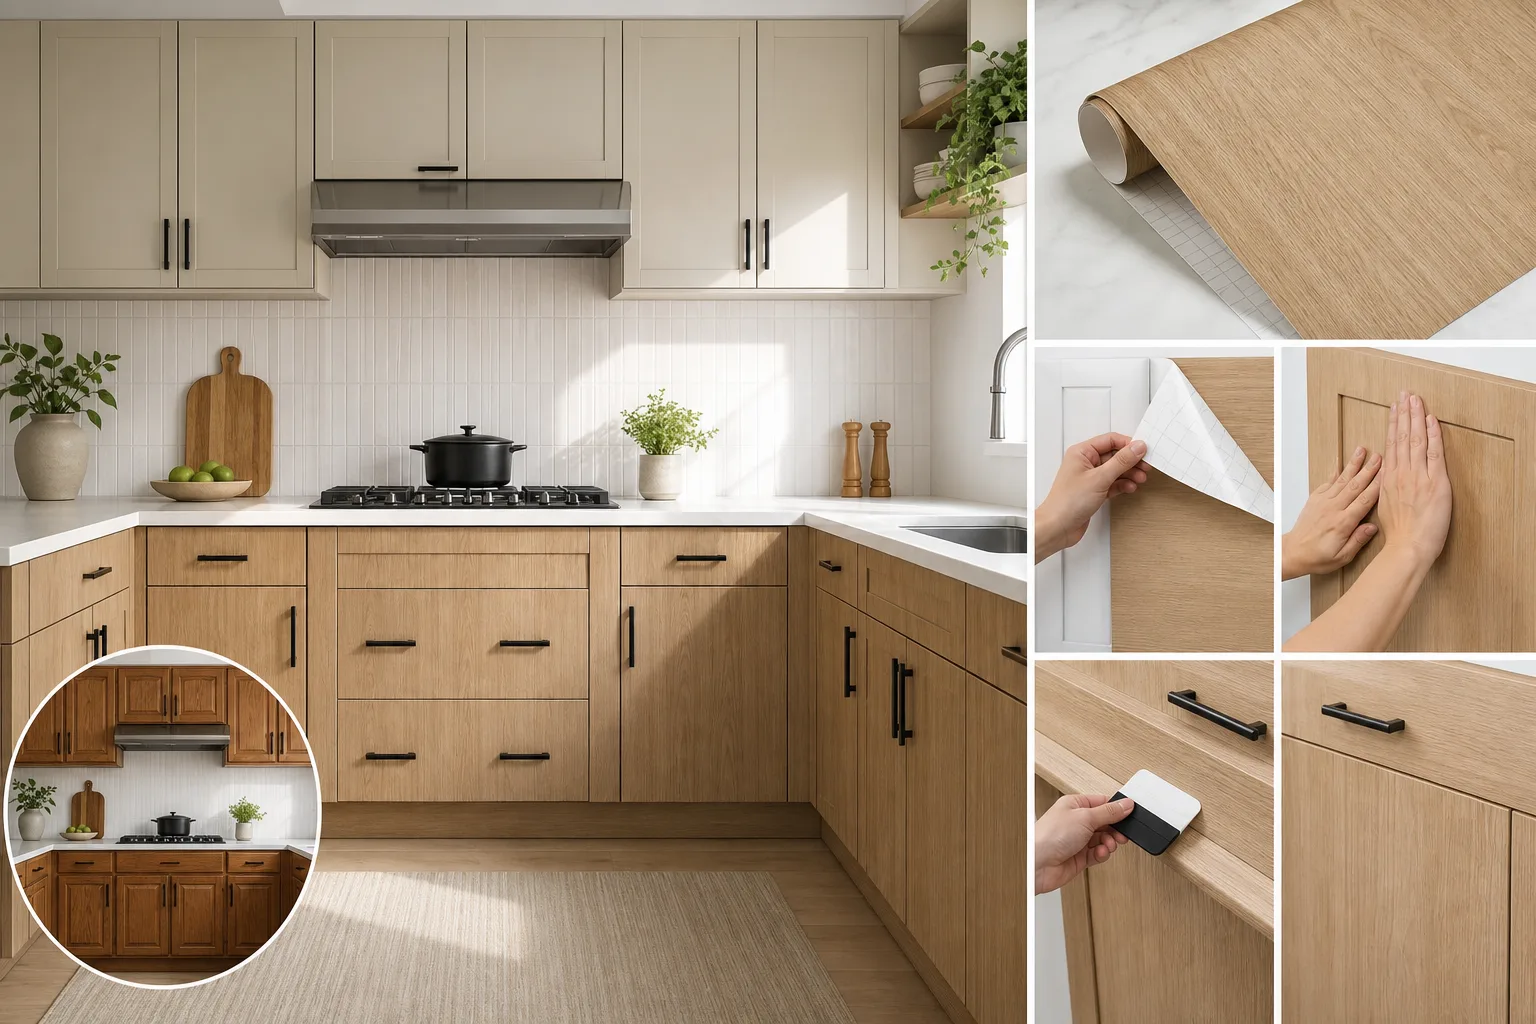
Peel-and-stick vinyl is a useful option when the cabinet finish is damaged, overly orange, too glossy, or simply not your style. It comes in solid colors, wood grains, linen textures, and subtle stone-inspired patterns. Unlike paint, quality vinyl can be removed later with careful heat and patience, making it a compelling option for renters.
For the most convincing result, avoid busy prints and choose a finish that complements the cabinet shape. A soft oak-look vinyl can modernize flat laminate doors, while a warm white or greige wrap can brighten a dark kitchen. Apply it to a small test area first, especially on textured laminate or peeling thermofoil, where adhesion may be unreliable.
Clean the surface, measure each door individually, and use a felt-edged squeegee to work out air bubbles. Wrap only the door fronts if you want a simpler project, or include drawer faces and visible side panels for a more complete transformation.
5. Add Decorative Molding to Flat Cabinet Doors
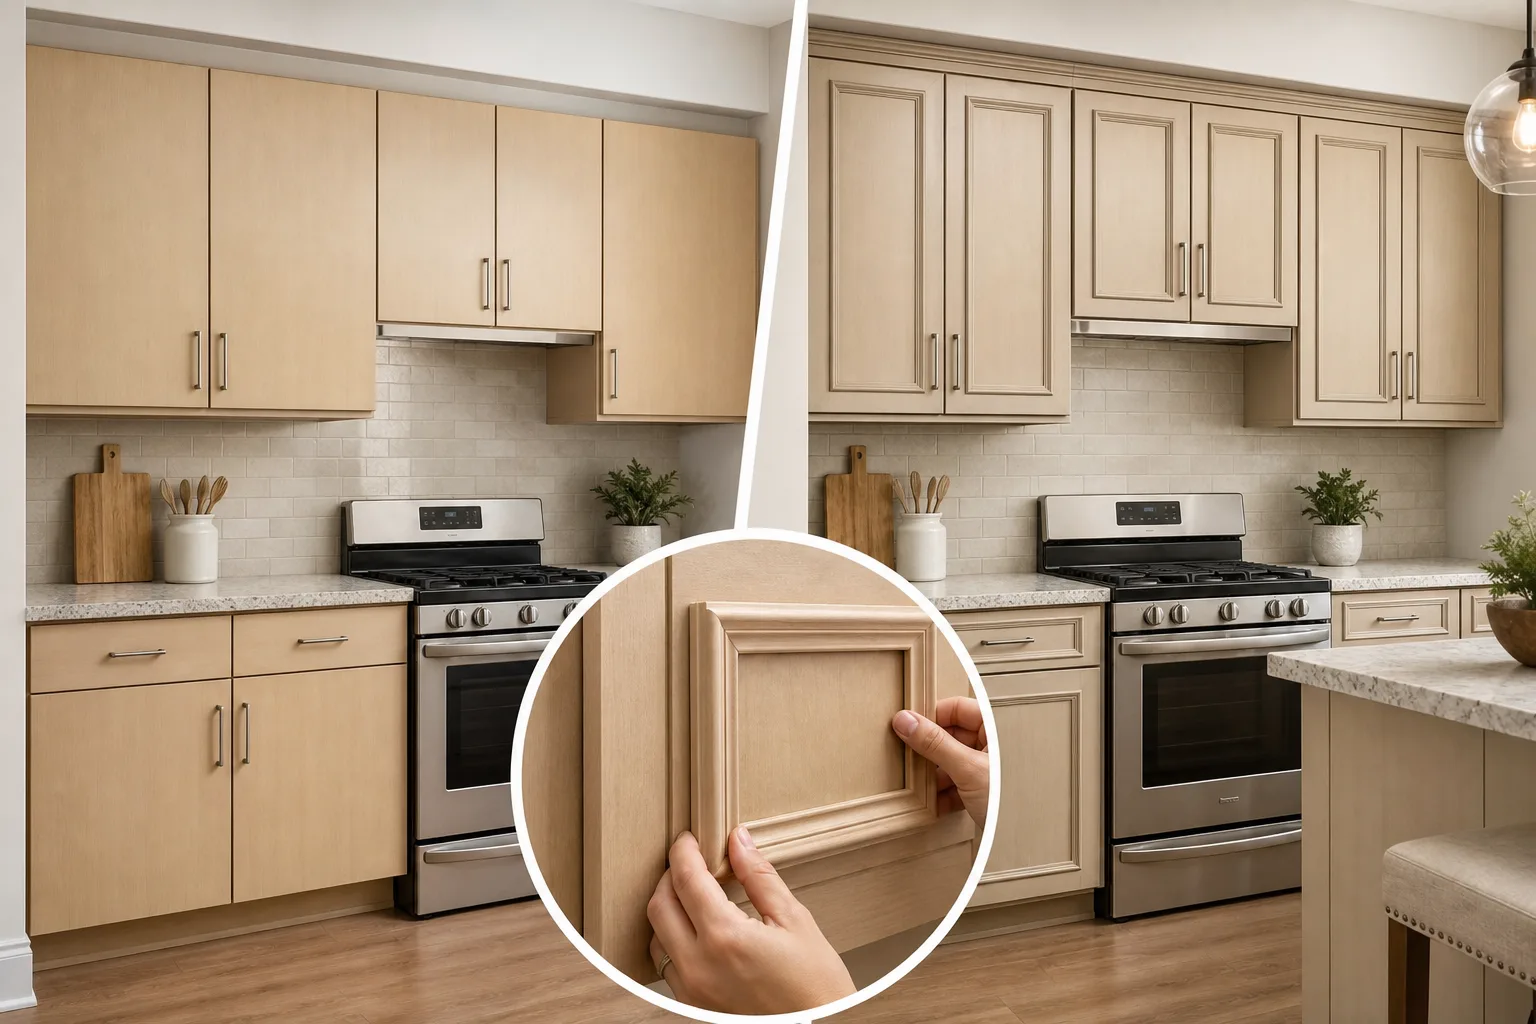
Flat-front cabinets do not have to remain plain. Lightweight picture-frame molding or narrow trim can create a shaker-inspired effect without replacing the doors. This approach works best on smooth, stable door fronts with enough flat space around the edges.
Cut trim to size, dry-fit each piece, and attach it with a strong construction adhesive designed for the cabinet material. Keep the design simple: four clean pieces arranged in a rectangle look more refined than overly intricate patterns. Once installed, the molding can remain in its natural finish, be wrapped in vinyl, or coordinate with the cabinetry through another non-paint treatment.
Be mindful of door clearance. Thick trim near the hinge side or cabinet edge can cause doors to rub together when closed.
6. Remove a Few Doors for Open Display Shelves
Removing one or two upper cabinet doors creates an airy display area and breaks up a heavy wall of cabinetry. It is a no-paint update that works particularly well in small kitchens, where uninterrupted rows of upper cabinets can feel visually bulky.
Choose a cabinet section that is easy to keep neat, ideally near everyday dishes, glassware, or mugs. Store matching pieces in small groups and leave some breathing room instead of filling every inch. You can also line the cabinet interior with removable wallpaper for a little depth and pattern.
Keep the doors and hardware labeled and stored safely so you can reinstall them later. If your kitchen needs more visual interest beyond the cabinets, these small kitchen wall decor ideas can help you balance open shelving with the rest of the room.
7. Refresh the Interior With Shelf Liners
Cabinet interiors are easy to overlook, but they affect how the kitchen feels during daily use. Fresh shelf liners hide stains, protect shelves, and make older cabinets feel cleaner. Non-adhesive liners are easiest to remove and replace, while adhesive options create a smoother, more tailored finish.
Choose a subtle neutral, a small-scale gingham, or a quiet floral pattern that fits your overall kitchen style. Use liners in glass-front cabinets, open cabinets, or drawers for the greatest visual payoff. Avoid very slippery materials in deep drawers unless you also use organizers to keep items stable.
8. Install Glass, Acrylic, or Decorative Film in Select Doors
If some cabinet doors have recessed panels, you may be able to replace the center panel with glass or acrylic inserts. This can make a traditional kitchen feel lighter without changing every cabinet. Reeded glass, frosted acrylic, and wire-mesh inserts all offer privacy while adding texture.
For a lower-commitment alternative, apply privacy film or reeded window film to existing glass doors. The film softens the view of mismatched dishes while still reflecting light. Use it on just one cabinet bank to create a focal point rather than making every upper cabinet a display area.
9. Change the Backsplash to Reframe the Cabinets
Sometimes cabinets look dated because the backsplash around them is dated. A fresh backsplash can create contrast that makes existing cabinet finishes feel more appealing. For example, warm wood cabinets often look more current next to creamy handmade-look tile, soft white subway tile, or a simple light neutral slab-style backsplash.
Renters can use removable tile decals, peel-and-stick tiles, or temporary backsplash panels. The right product can create a built-in appearance without permanent construction. Explore more options in these renter-friendly kitchen backsplash ideas.
Before committing, bring home samples and view them next to the cabinet doors in morning, afternoon, and evening light. Undertones matter: a cool gray backsplash can make honey oak look more orange, while warm ivory can make it feel richer and more intentional.
10. Update the Countertops or Use a Reversible Covering
Countertops visually connect the lower and upper cabinets, so updating them can shift the entire room. If replacement is not in the budget, consider a reversible countertop covering, a professionally installed overlay, or a durable contact-paper solution designed specifically for counters. These options are especially useful when the existing counter has a busy pattern that clashes with the cabinets.
Choose a quiet countertop finish when your cabinet grain is pronounced. Warm white, soft taupe, muted charcoal, and subtle stone looks usually provide a calmer backdrop than high-contrast faux granite patterns. For more lease-friendly approaches, see renter-friendly kitchen counter makeover ideas.
11. Add Cabinet Crown Molding or a Top Trim Detail
If upper cabinets stop short of the ceiling, crown molding or a simple top trim can make them look taller and more built-in. This works best when the gap above the cabinets is relatively modest. A larger gap may benefit from intentional styling rather than trying to disguise it.
Use lightweight molding and match the finish as closely as possible to the cabinet exterior, or select a coordinating wood tone. If your cabinets extend high enough to leave a decorative zone, consider these above kitchen cabinet decor ideas for high ceilings for practical, uncluttered ways to use the space.
12. Create Contrast With a New Faucet and Sink Accessories
A faucet upgrade does not alter the cabinets directly, but it changes the focal point at the center of the kitchen. Coordinate the faucet finish with new pulls or knobs to make the update look planned. A high-arc faucet in brushed brass can warm up medium wood cabinetry, while black adds definition in a neutral kitchen.
Complete the area with a matching soap dispenser, a simple tray for dish soap, and a wood or stone utensil holder. These small items reinforce the new finish palette without adding clutter to the counter.
13. Style Cabinets With Warm, Intentional Color
When you are not painting cabinets, the surrounding palette becomes more important. Warm neutrals can make dated wood tones look softer and more cohesive. Consider oatmeal-colored textiles, creamy ceramics, muted olive accents, terracotta planters, or natural woven materials.
Repeat two or three colors throughout the room rather than introducing many competing accents. A neutral runner, coordinated dish towels, and a few countertop pieces can make existing cabinets feel part of a finished design. For inspiration, browse these warm neutral kitchen decor ideas.
14. Improve Organization So Cabinets Function Better
A makeover should improve daily life as well as appearance. Add pull-out bins, drawer dividers, vertical organizers for baking sheets, under-sink trays, and turntables in deep corner cabinets. Organized cabinets close more easily, hold more, and feel less frustrating to use.
Clear countertop clutter to let your cabinetry become a feature. Keep only frequently used items accessible, and designate zones for coffee supplies, cooking tools, food storage, and cleaning products. In a compact room, focused storage improvements can be more transformative than decorative changes alone.
15. Pair Cabinet Updates With One Larger Kitchen Refresh
For the most convincing result, combine two or three cabinet changes with one adjacent upgrade. New hardware plus under-cabinet lighting and a backsplash, for example, can create a dramatic transformation without painting or replacing a single door. Another effective combination is door trim, a new faucet, and warm neutral decor.
If you want a broader plan, read how to update a kitchen without replacing cabinets. For an especially cost-conscious approach, this collection of small kitchen makeover ideas on a budget offers additional high-impact projects.
How to Choose the Right No-Paint Cabinet Makeover
Start by identifying what you dislike most: the color, the hardware, the door style, the lack of light, or the way the cabinets relate to the counters and backsplash. Address that issue first. Replacing perfectly functional cabinets is rarely necessary when the problem is really a dated backsplash or old-fashioned knobs.
Also consider permanence. Homeowners may be comfortable installing molding, replacing hinges, or adding glass inserts. Renters should focus on removable hardware, battery-powered lighting, peel-and-stick products, and stored door components. If you need lease-friendly options, see renter-friendly kitchen cabinet makeover ideas.
Finally, make a mood board before purchasing. Include cabinet photos, hardware samples, backsplash options, lighting finishes, and countertop swatches. This simple step helps you avoid mixing clashing undertones and creates a kitchen that feels cohesive rather than pieced together.
FAQ: Kitchen Cabinet Makeover Without Painting
Can I make old kitchen cabinets look modern without painting them?
Yes. Replace outdated hardware, add under-cabinet lighting, improve door alignment, update the backsplash, and use warm, cohesive decor. For flat cabinet doors, adding simple trim or applying quality vinyl can also change the style significantly without paint.
What is the cheapest way to update kitchen cabinets without painting?
Cleaning, adjusting hinges, replacing knobs or pulls, and adding shelf liners are usually the least expensive options. A new hardware set often delivers the biggest visual improvement for the cost.
Does peel-and-stick vinyl work on kitchen cabinets?
It can work well on smooth, clean, stable surfaces such as laminate or sealed wood. Test a small hidden area first, and avoid applying it over loose thermofoil, peeling veneer, or heavily textured surfaces. Careful measuring and installation are essential for a polished result.
How can renters update kitchen cabinets without damaging them?
Use removable hardware that fits existing holes, rechargeable under-cabinet lights, non-adhesive shelf liners, removable wallpaper inside cabinets, and peel-and-stick finishes approved for your surface. Save original hardware and document the cabinet condition before starting.
Should cabinet hardware match the faucet?
It does not need to match exactly, but the finishes should look intentional together. Brushed brass and champagne bronze can pair well, for example, while matte black hardware works naturally with a black faucet. Repeat one finish in at least two areas for cohesion.
How do I make wood cabinets look less orange without paint?
Use surrounding finishes with warm but muted undertones, such as cream, taupe, soft olive, or earthy beige. Avoid icy grays and bright blue-whites, which can make orange undertones appear stronger. Updating hardware, lighting, backsplash, and counters can also visually balance the wood.
