
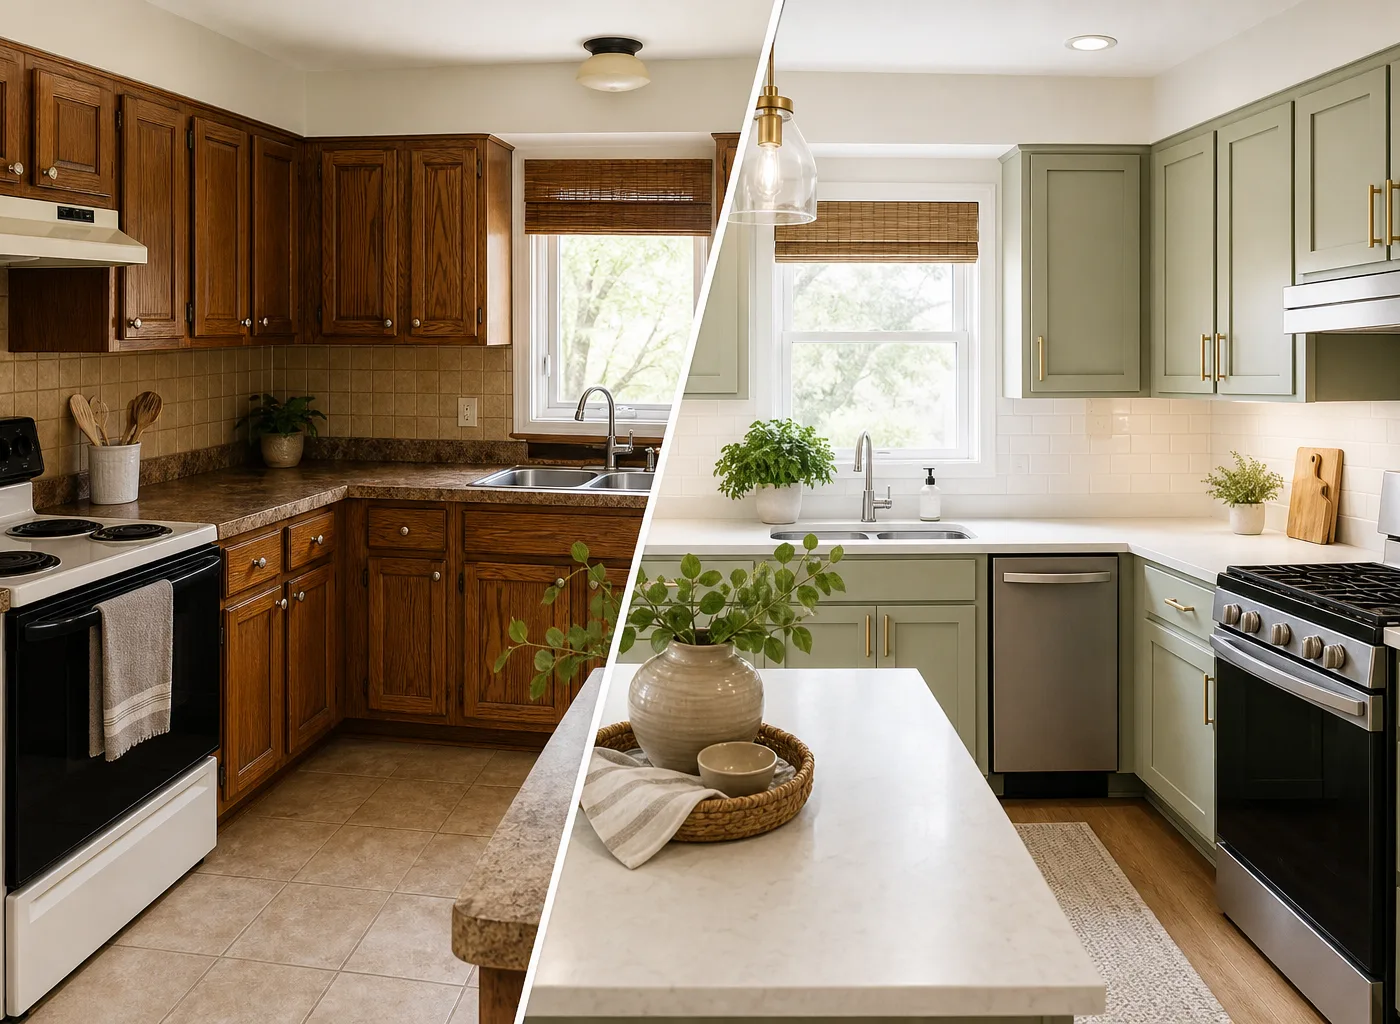
An old wood kitchen cabinets makeover is one of the most effective ways to update a dated kitchen without committing to a full renovation. Solid wood cabinets are often better built than many newer budget options, even when their orange oak, dark stain, worn finish, or bulky hardware makes the room feel stuck in another decade.
The good news is that you do not need to replace sturdy cabinets to make them look current. A careful deep clean, a new finish, updated hardware, improved lighting, and a few surrounding design changes can make a major difference. Whether you want a bright painted kitchen, a warm natural-wood look, or a lower-cost refresh that preserves the existing finish, this guide will help you choose the right approach.
First, Decide Whether Your Wood Cabinets Should Be Kept
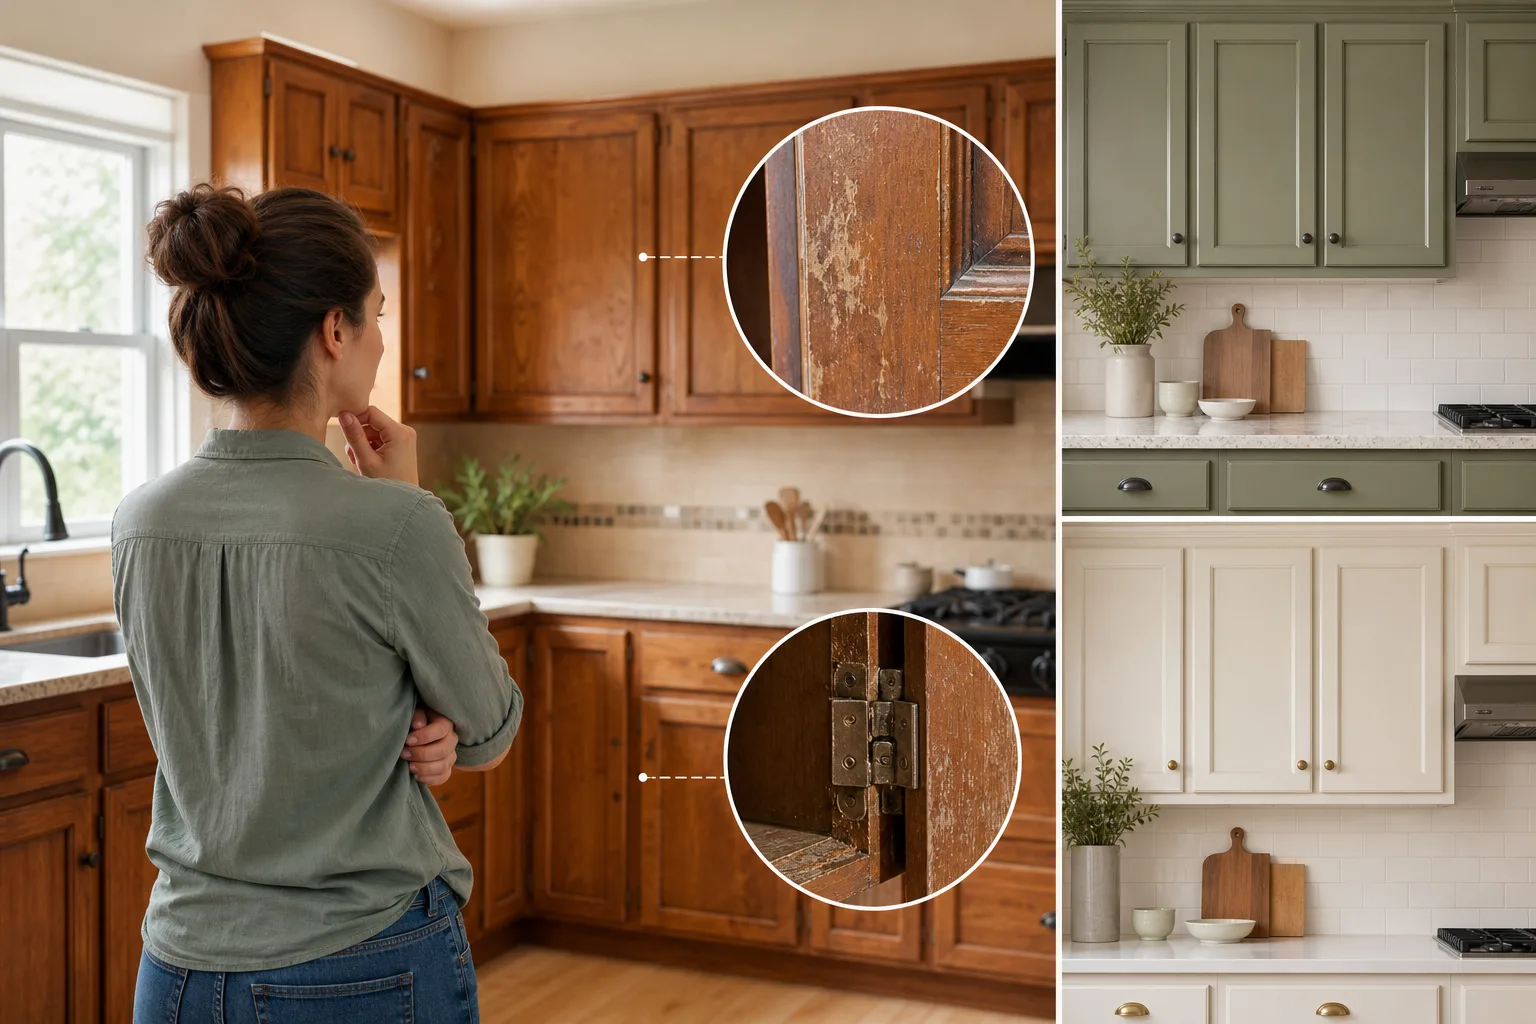
Before choosing paint colors or shopping for pulls, inspect the cabinet boxes, doors, and drawers. Cosmetic age is not the same as structural damage. Cabinets are generally excellent candidates for a makeover if the boxes are level, the doors are intact, and the drawers still operate reasonably well.
Keep and refresh your cabinets when they have:
- Solid wood doors or sturdy plywood cabinet boxes
- Minor scratches, faded stain, grease buildup, or a yellowed clear coat
- Loose hinges, outdated pulls, or worn drawer slides that can be replaced
- A layout that still works for your household
- Only localized water damage that can be repaired
Consider professional repair or replacement if there is extensive rot beneath the sink, severe warping, widespread delamination, mold, or cabinet boxes that are failing. In many kitchens, however, old cabinets simply need thoughtful cosmetic work rather than demolition.
1. Start With a Serious Deep Clean
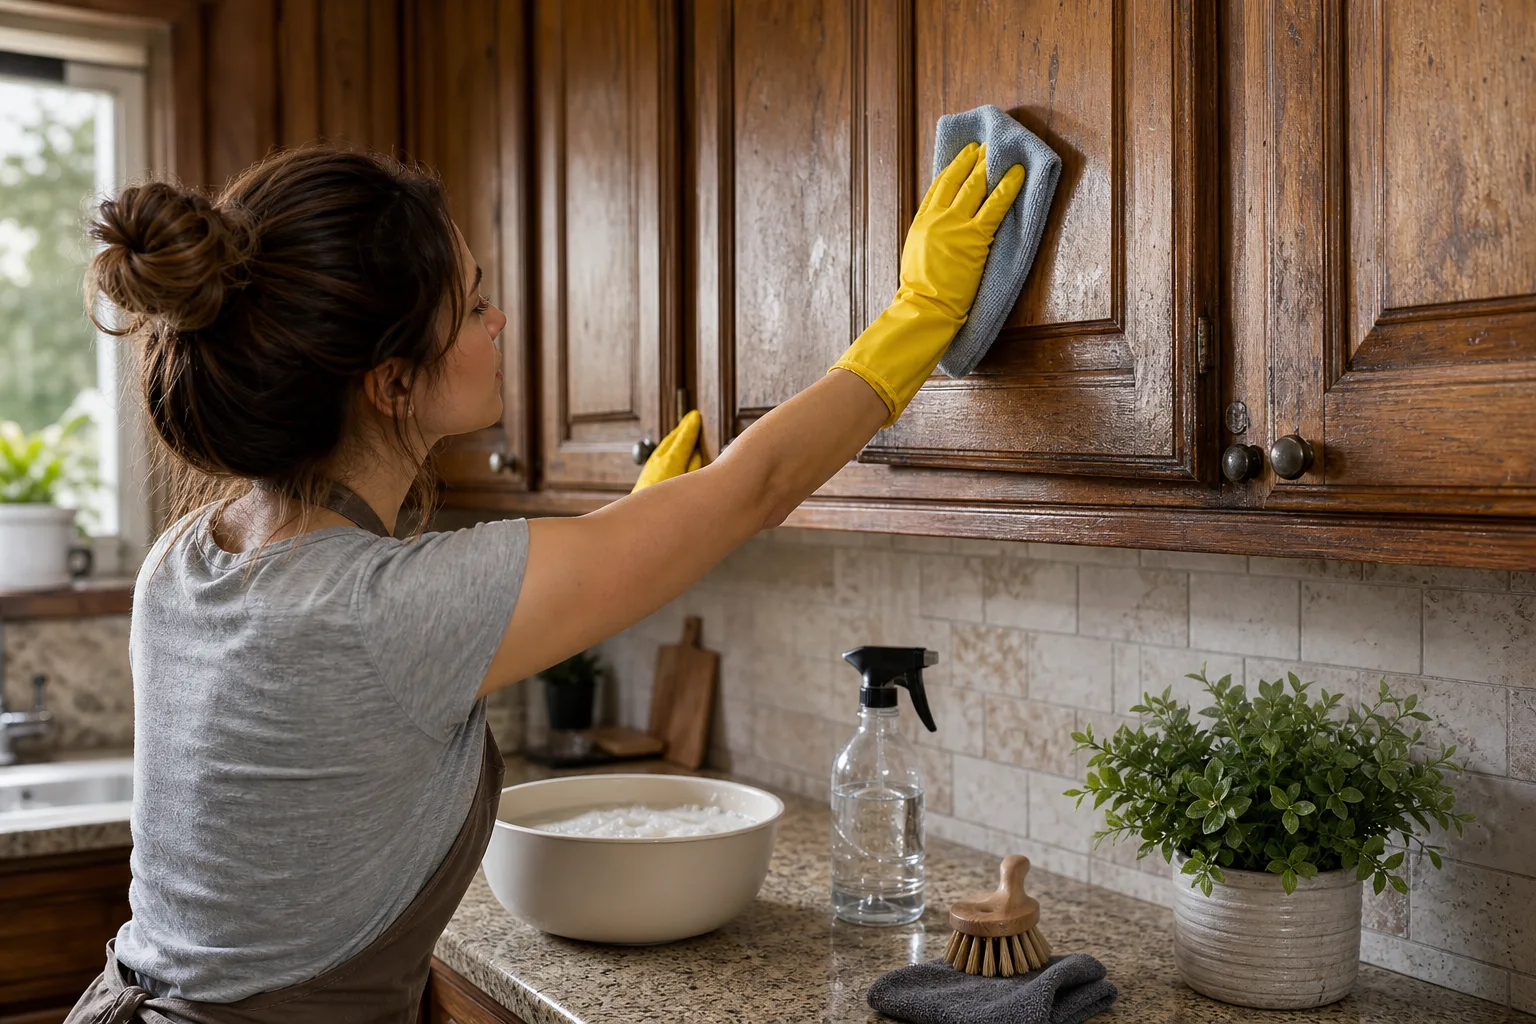
Years of cooking grease can make wood cabinets look darker, duller, and more yellow than they really are. Cleaning may not sound transformative, but it is essential before deciding whether to preserve, stain, or paint the wood.
Remove the doors if possible, label each hinge location, and clean all surfaces with a degreasing cabinet cleaner or a mild solution designed for finished wood. Work in small sections with a soft cloth or nonabrasive scrub pad. Avoid soaking the wood, especially around joints and unfinished edges. Rinse with a clean damp cloth, then let every surface dry fully.
This step reveals the true condition of the finish and ensures that paint, primer, or a new topcoat will adhere properly. Do not skip it: paint applied over invisible grease can chip or peel prematurely.
2. Choose the Best Makeover Path for Your Cabinets
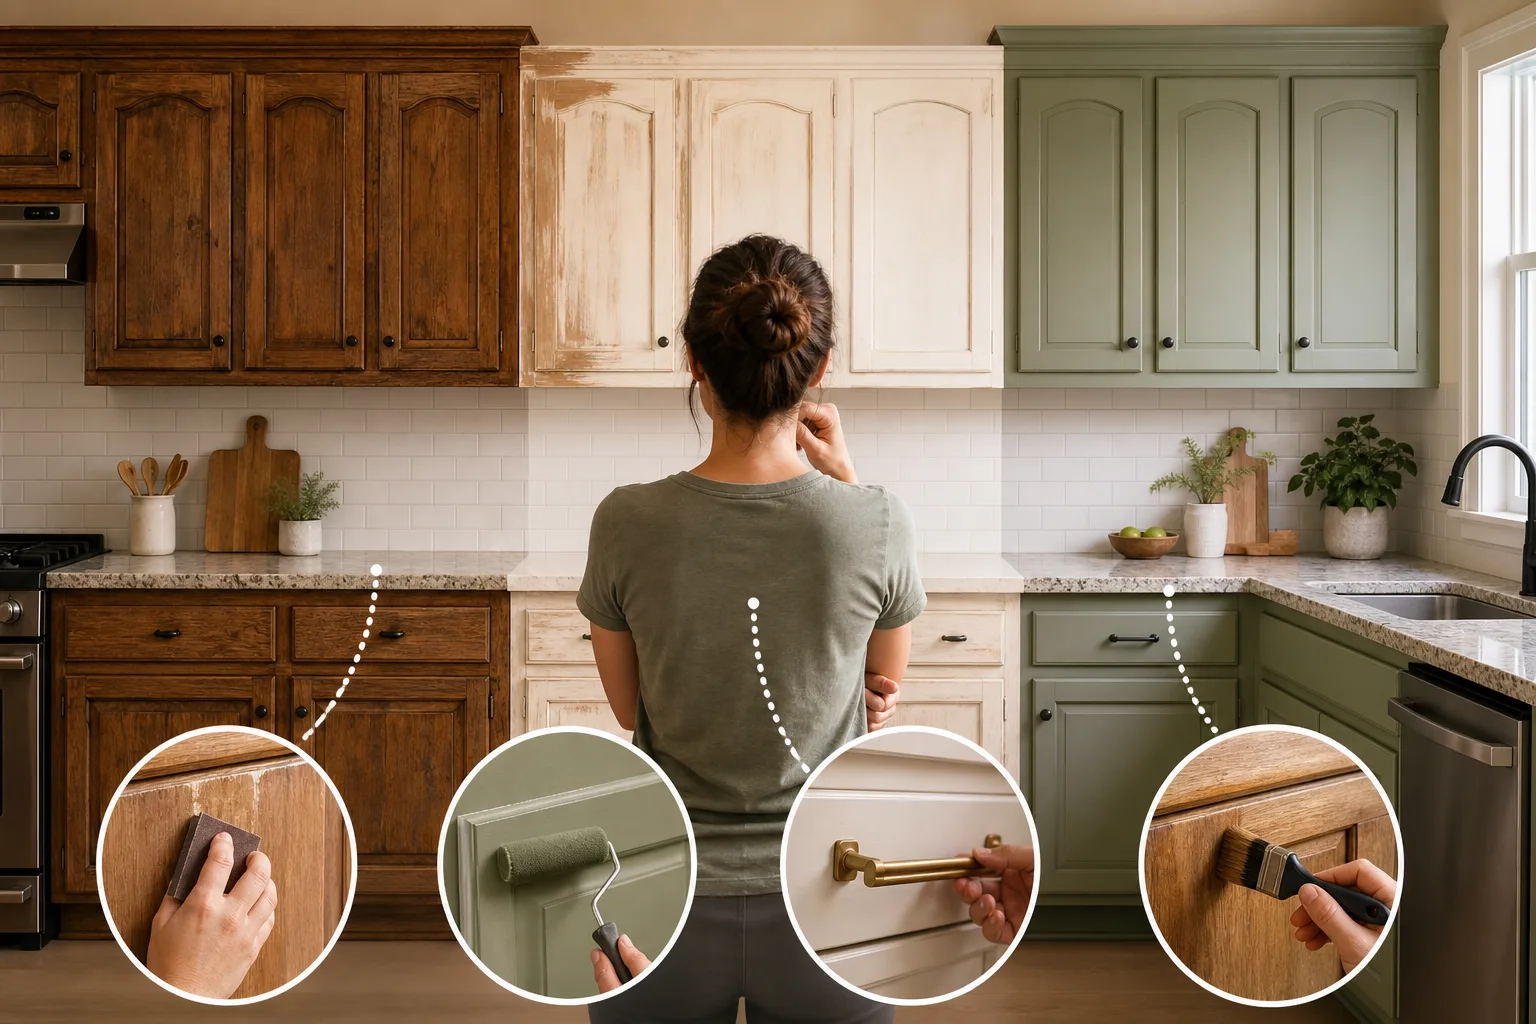
The right old wood kitchen cabinets makeover depends on the style you want, the condition of the finish, and your budget. There is no single best solution for every kitchen.
Paint for the biggest visual change
Painting is ideal when the grain is overly orange, the stain is uneven, or you want a cleaner, more contemporary kitchen. Soft white, warm greige, mushroom taupe, muted sage, deep navy, and charcoal are popular choices because they work with many countertop and flooring materials.
For the most durable result, clean, lightly sand, use a bonding primer appropriate for wood, and apply cabinet-grade paint in thin coats. A high-quality microfiber roller, angled brush, or paint sprayer can create a smoother finish. Allow proper curing time before putting the kitchen back into heavy use.
Restain for a natural wood look
If your cabinets are genuine wood with attractive grain, restaining can retain their character while removing an outdated tone. This route takes more prep because the old topcoat often needs to be stripped or sanded back before the new stain can penetrate evenly.
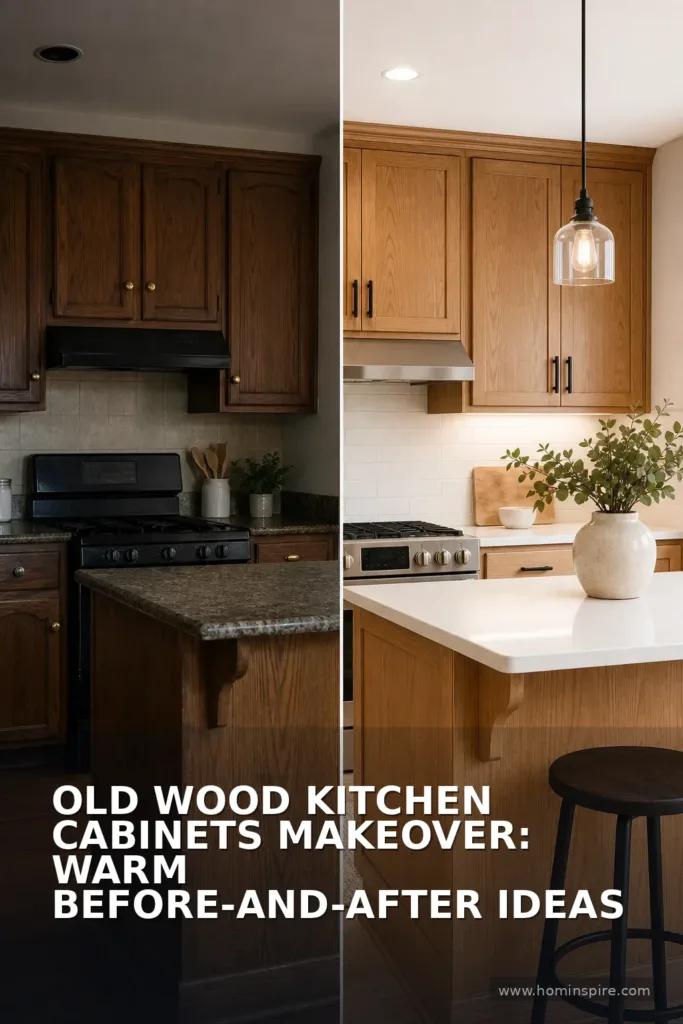
Popular updated wood tones include natural oak, light walnut, medium brown, and neutral brown shades with less red or orange. Test the stain on the back of a door first. Wood species, age, and previous finishing products can change the final color dramatically.
Refresh the clear coat when the color still works
When the cabinet color is acceptable but the finish looks tired, a light scuff-sand and fresh protective topcoat may be enough. This is a useful option for homeowners who like traditional wood but want it to look cleaner and better maintained.
Use two-tone cabinets for depth
A two-tone approach breaks up a heavy wall of wood. For example, paint upper cabinets a light warm white and leave lower cabinets in a refined wood finish, or paint the island a darker accent color. This can make a compact kitchen feel more open without losing the warmth of wood.
3. Repair Dings, Gaps, and Worn Details Before Finishing
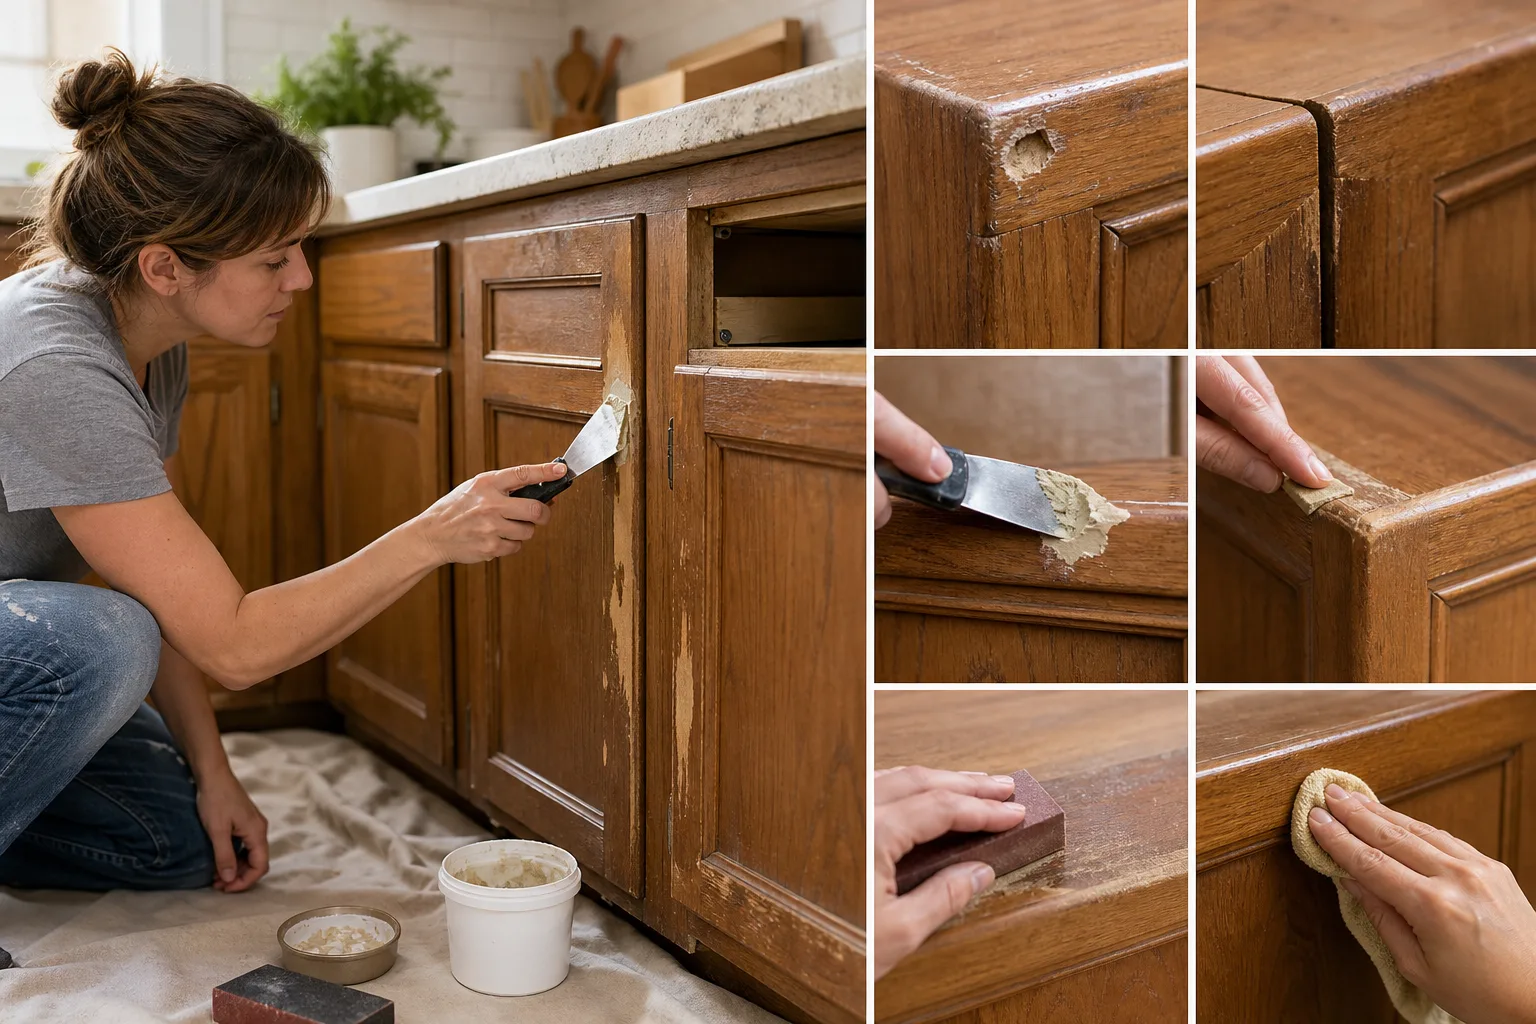
Small repairs have an outsized effect on a finished kitchen. Fill dents, deep scratches, and old hardware holes with a stainable wood filler if you plan to stain, or a paintable filler if you plan to paint. Sand repairs flush only after they are fully dry.
Also tighten loose hinges, repair separated joints, adjust doors that hang unevenly, and replace broken drawer slides. If doors have visible gaps or do not sit level, the kitchen can still look dated even after a beautiful paint job. Many older hinges can be adjusted, while concealed soft-close hinges can be installed on some cabinet styles for a more modern feel.
4. Update Hardware for an Immediate Improvement
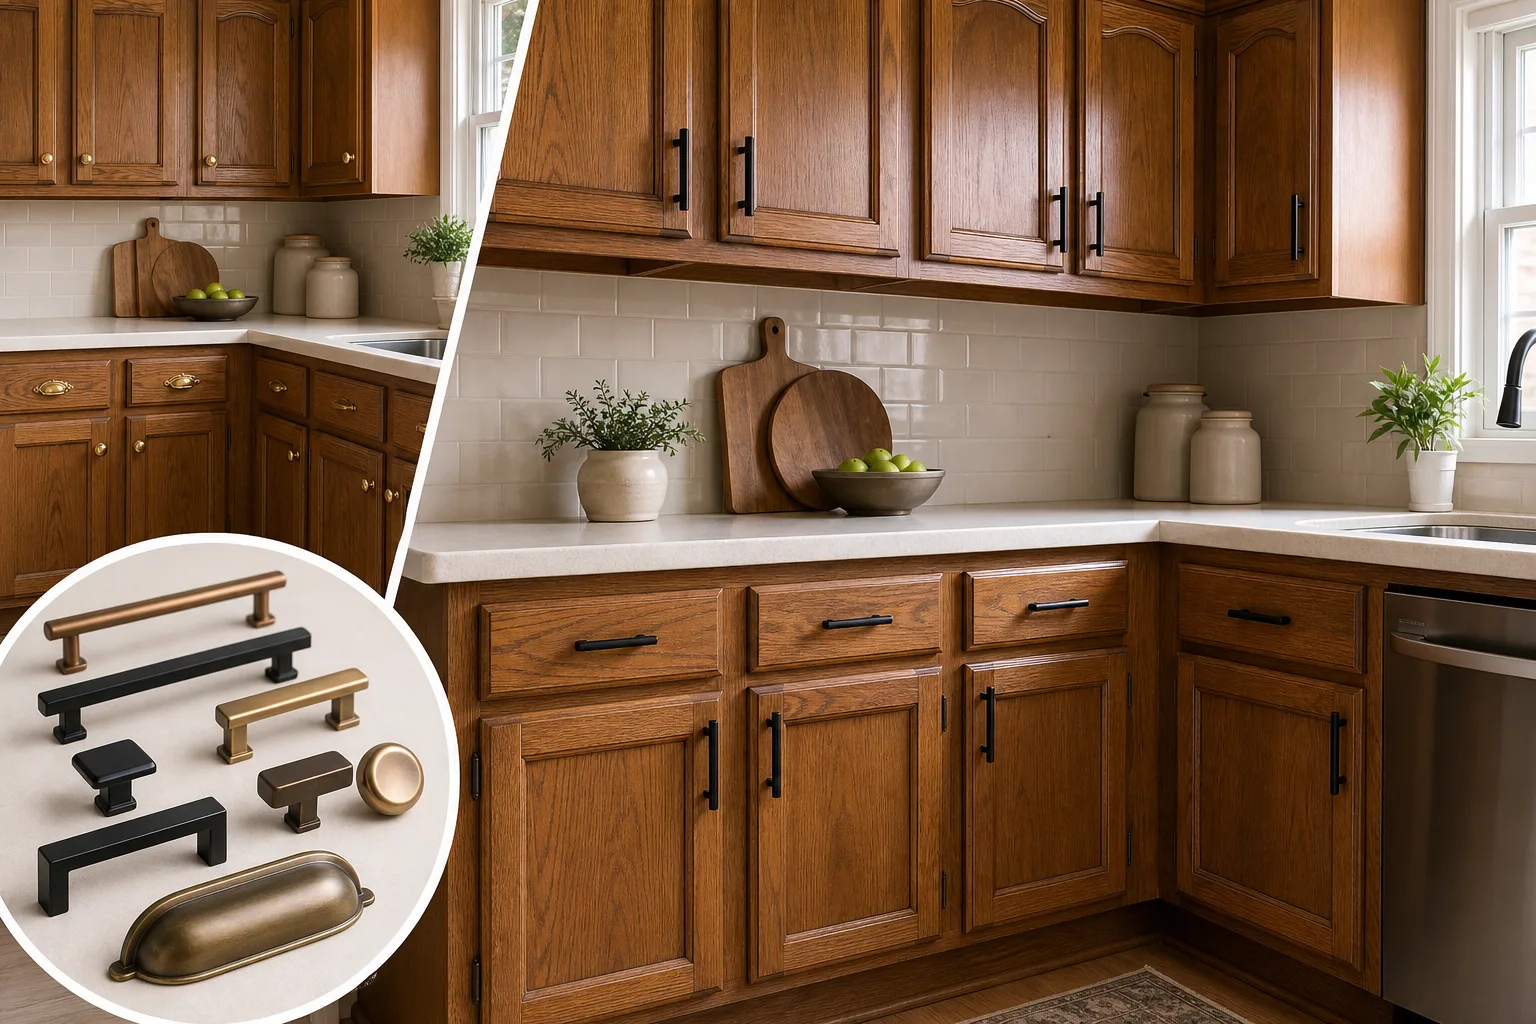
Replacing hardware is among the fastest ways to modernize old wood cabinets. Small knobs, shiny brass pulls from the 1980s, or ornate handles can make otherwise good cabinets look dated. Hardware provides a deliberate finishing detail and can change the overall style in an afternoon.
For a timeless look, choose simple bar pulls, rounded pulls, or clean-lined knobs. Brushed nickel and satin brass are versatile, while matte black offers contrast against pale paint or light oak. Oil-rubbed bronze can complement traditional kitchens and medium-to-dark wood tones.
Measure the center-to-center distance between existing handle holes before ordering replacements. Choosing hardware with matching spacing prevents unnecessary filling and drilling. If you want a bigger style change, use a cabinet hardware jig to keep new holes aligned.
5. Modernize the Surrounding Surfaces
Cabinets do not exist in isolation. An old wood cabinet color can seem much more current after updates to the backsplash, walls, countertops, and lighting. Focus on the elements that have the highest visual impact within your budget.
Paint the walls strategically
Warm white, soft beige, pale gray-green, and muted clay tones can balance wood cabinets better than stark cool gray. If the wood has strong orange undertones, avoid wall colors that intensify orange or yellow. Bring home large paint samples and view them in morning, afternoon, and artificial light.
Refresh the backsplash
A simple backsplash can make old cabinets feel intentional rather than outdated. White subway tile, handmade-look ceramic tile, soft neutral zellige-style tile, or a clean slab backsplash all pair well with refreshed wood. Peel-and-stick options can be useful for a temporary or low-cost update, provided the wall is smooth and clean.
Work with your existing countertops
Not every makeover needs new counters. Clean and reseal natural stone, replace a worn caulk line, and choose cabinet colors that complement what you already own. For more low-cost ideas that create a substantial visual difference, see these budget kitchen makeover ideas.
6. Add Better Lighting Under and Over the Cabinets
Lighting can make stained wood look richer and painted cabinets look cleaner. Under-cabinet LED lighting removes shadows from work surfaces and gives a kitchen a more finished appearance. Choose a warm-neutral color temperature, generally around 2700K to 3000K, to avoid making wood look harsh or overly yellow.
Replace an oversized dated ceiling fixture with a simple flush mount, semi-flush light, or appropriately scaled pendant. If your kitchen has an island, pendants should provide task lighting without blocking sightlines. Good lighting is especially valuable in small or narrow kitchens, where it helps the room feel less enclosed.
7. Make the Countertops Look Intentional, Not Crowded
After updating cabinets, avoid covering the new look with countertop clutter. Keep only daily-use items out, such as a coffee maker, one utensil crock, or a compact tray. A wood board, ceramic canister, or small plant can add warmth without creating visual noise.
For practical styling guidance, explore kitchen counter decor ideas without clutter. The goal is not an empty, unrealistic kitchen; it is to give the cabinet makeover enough visual breathing room to stand out.
8. Improve Storage While the Cabinets Are Empty
A makeover is the perfect time to make old cabinetry function better. Add drawer organizers, pull-out bins, shelf risers, lazy Susans, and roll-out trays where they solve a real problem. These updates can make older cabinets feel much more useful without changing their footprint.
For renters or homeowners who do not want to drill into cabinet boxes, consider tension organizers, adhesive hooks rated for kitchen use, and freestanding shelf inserts. Find more options in this guide to renter-friendly kitchen storage ideas without drilling.
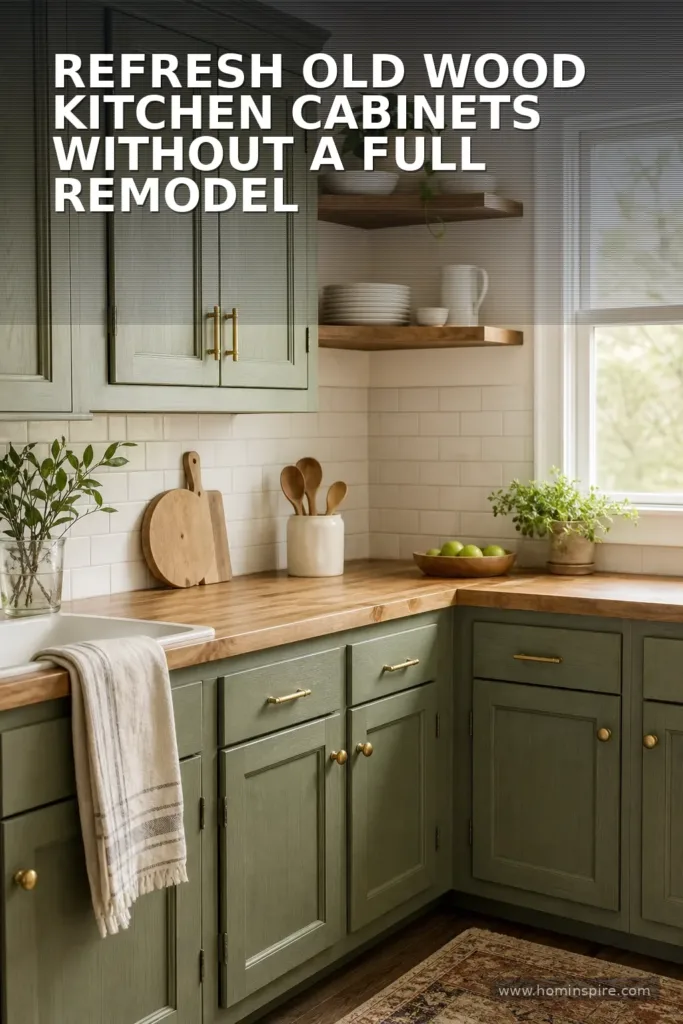
9. Consider Selective Door Changes Instead of Full Replacement
If cabinet boxes are sound but door profiles feel overly ornate, replacing only the doors can be a middle-ground option. This is often called refacing when paired with a matching veneer on visible cabinet frames. It costs more than paint but less than a full cabinet replacement in many cases.
Another option is to remove one or two upper doors and create open shelving for everyday dishes. Do this sparingly and only if you can keep the shelves organized. Glass inserts can also lighten the look of a wall of upper cabinets, although they require more upkeep because cabinet contents remain visible.
10. Create a Realistic Budget and Timeline
A DIY refresh with cleaning supplies, paint, primer, hardware, and lighting may cost a few hundred dollars, depending on kitchen size and product quality. Professional cabinet painting can cost substantially more, but it may be worthwhile for intricate doors, difficult finishes, or homeowners who want a sprayed finish and warranty.
Plan for more time than you expect. Proper prep, drying, sanding, and curing matter more than rushing through color application. For a typical DIY project, expect several days to a week of active work, plus curing time before cabinets can handle regular wear.
If you are working with a limited budget, prioritize in this order: repair and clean, paint or refinish, hardware, lighting, backsplash, then optional storage upgrades. For more strategies, read kitchen makeover ideas without replacing the cabinets.
11. Common Mistakes to Avoid
- Painting without degreasing: Grease prevents proper adhesion and can ruin an otherwise careful project.
- Skipping primer: A quality bonding primer helps block tannins and creates a durable base, especially on oak and other porous woods.
- Using wall paint: Cabinet-grade paint or enamel is designed to handle frequent cleaning and contact.
- Ignoring grain texture: Oak grain may remain visible after painting. Use grain filler only if you want a very smooth, modern finish.
- Choosing hardware before measuring: Confirm hole spacing and door proportions first.
- Making every surface trendy: Choose one or two modern upgrades and keep the rest of the room timeless.
- Overdecorating afterward: Let the renewed cabinets be the focal point.
12. Final Thoughts on an Old Wood Kitchen Cabinets Makeover
Old wood cabinets can be an asset rather than an obstacle. Their durable construction, solid doors, and existing layout provide a strong foundation for an affordable kitchen update. Whether you paint them a fresh neutral, restain them in a softer wood tone, or simply clean and re-hardware them, the key is careful preparation and a cohesive plan for the whole room.
Start with the changes that solve your biggest visual problem, then layer in smaller improvements. A well-executed cabinet makeover can make the kitchen feel brighter, more functional, and more personal—without the expense and waste of replacing cabinets that still have years of life left.
Frequently Asked Questions
Can old wood kitchen cabinets be painted?
Yes. Most solid wood cabinets can be painted successfully if they are cleaned, repaired, sanded or deglossed as needed, primed with a bonding primer, and coated with durable cabinet paint. Proper preparation is the most important part of the project.
Is it cheaper to paint old cabinets or replace them?
Painting is usually far less expensive than replacement, especially when cabinet boxes are structurally sound. Replacement may be justified when there is major water damage, poor layout, failing boxes, or a need to reconfigure the kitchen substantially.
How do you make orange oak cabinets look less dated?
You can reduce the dated appearance by refinishing them in a more neutral stain, painting them, changing brass or ornate hardware, adding warm-neutral wall paint, improving lighting, and using a simple backsplash. Avoid colors that emphasize orange or yellow undertones.
Do painted cabinets hold up well?
Painted cabinets can hold up very well when high-quality products and proper preparation are used. Allow the finish to cure fully, wipe spills promptly, and use gentle cleaners rather than abrasive scrubbers.
Should I keep wood grain visible when painting cabinets?
That depends on your preferred style. Visible grain gives cabinets texture and works well in casual, traditional, and transitional kitchens. For a smoother contemporary look, use a grain filler before priming and painting, knowing that it adds time and labor.
