
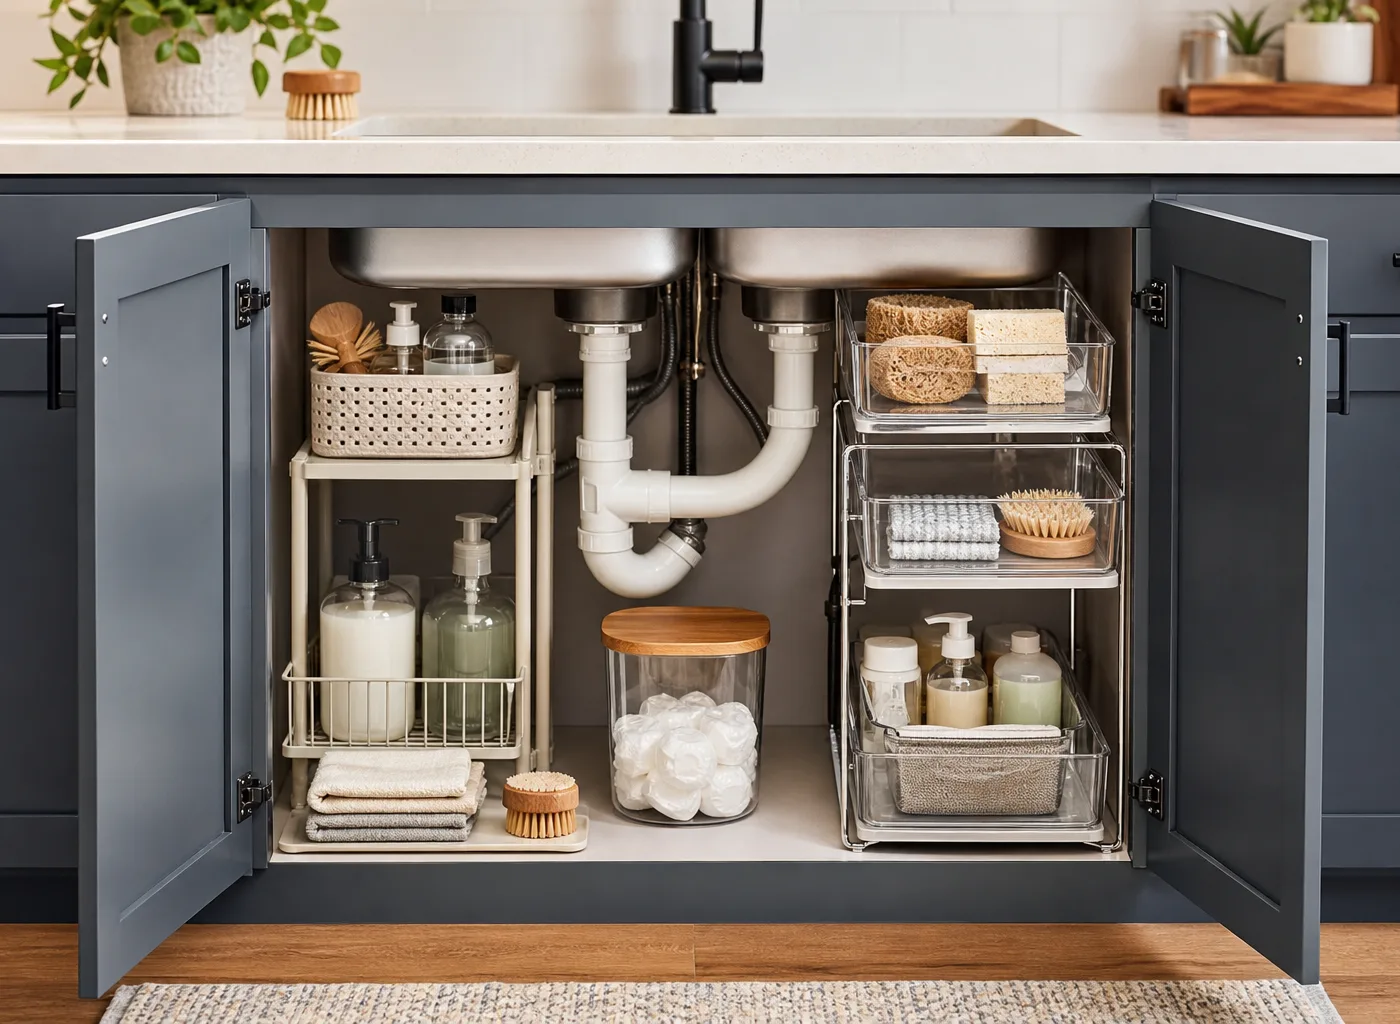
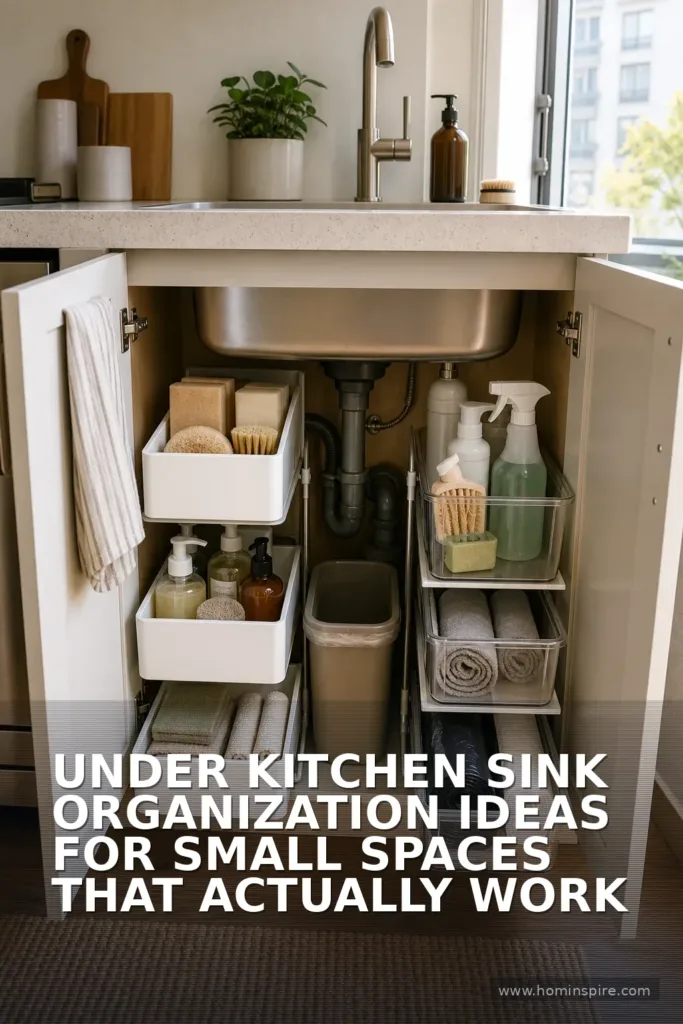
The cabinet under the kitchen sink is one of the hardest-working areas in a small home—and one of the easiest places to neglect. Pipes cut through the usable space, cleaning supplies collect quickly, and a single deep cabinet can become a frustrating pile of bottles, bags, and sponges. The good news is that effective under kitchen sink organization does not require custom cabinetry or an expensive renovation.
The best under kitchen sink organization ideas for small spaces make use of vertical room, create clear zones, and keep daily essentials within reach. Whether you have a tiny apartment kitchen, a narrow galley layout, or a rental with basic cabinets, these solutions can help you turn an awkward cabinet into an efficient cleaning station.
Start by Emptying, Cleaning, and Measuring the Cabinet
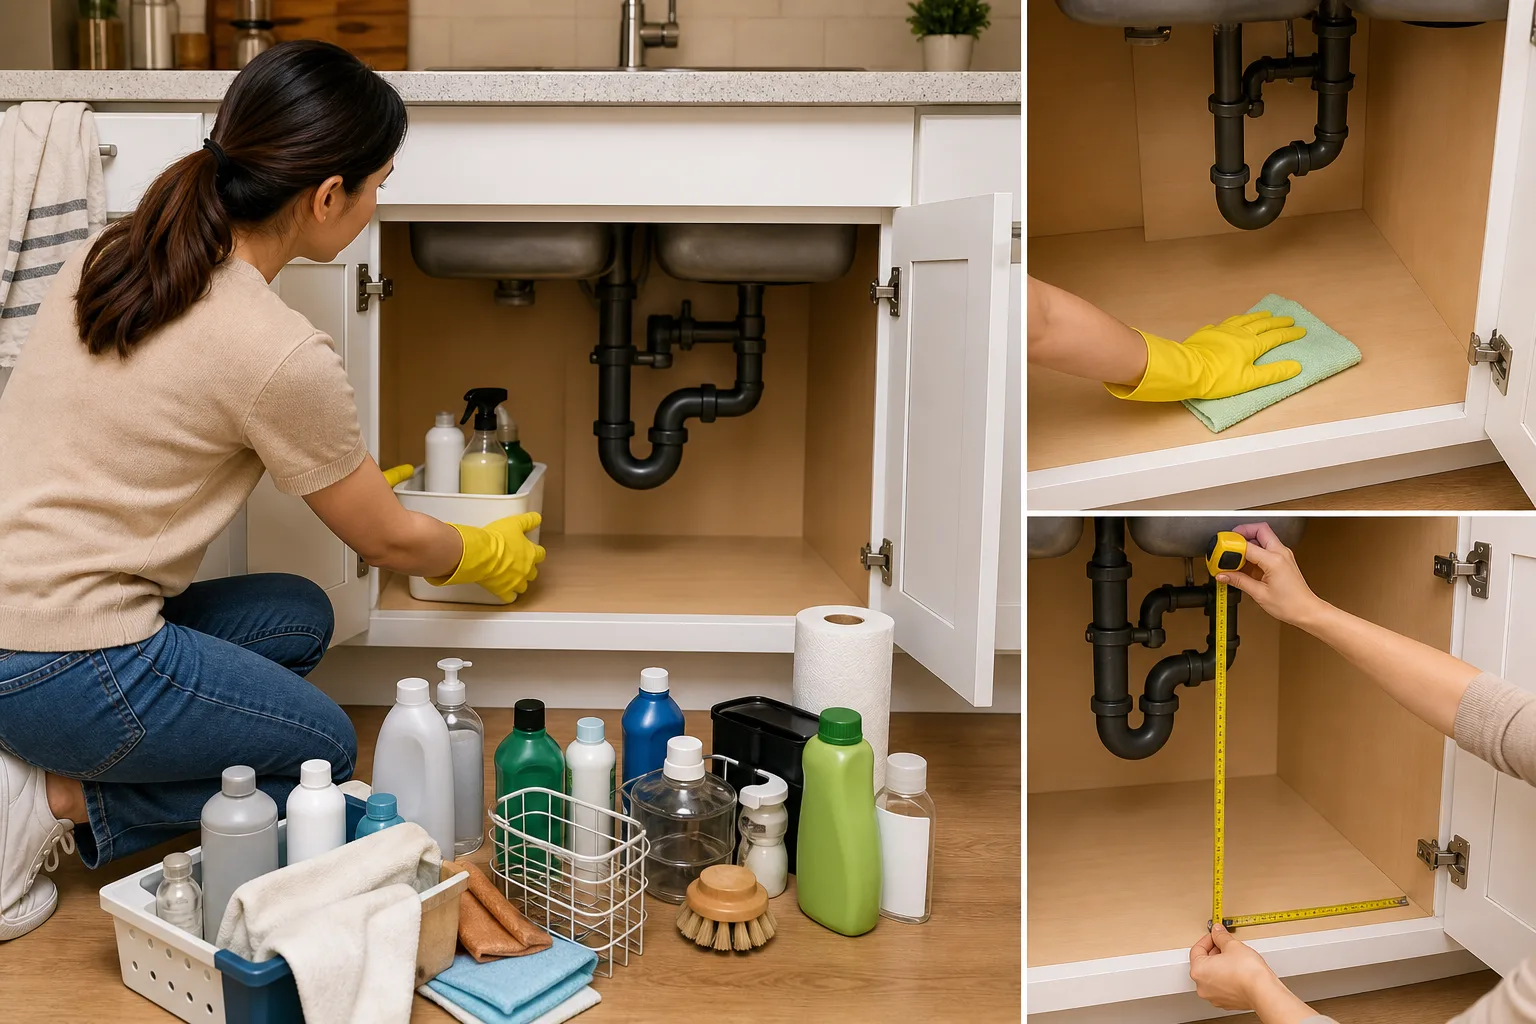
Before buying organizers, take everything out. This gives you an honest look at what is actually stored below the sink and how much of it you use. Discard empty containers, dried-out sponges, duplicate products, and anything past its useful life. If a product is rarely used, consider moving it to a utility closet or another storage area.
Wipe down the cabinet base and walls, then check carefully for signs of leaks, swelling, mildew, or loose plumbing. A waterproof cabinet liner or shallow plastic tray is worth adding before you put supplies back. It catches drips, makes cleanup easier, and helps protect the cabinet floor.
Next, measure the cabinet width, depth, and height. Measure around plumbing, not just the cabinet opening. Note the location of the drainpipe, shutoff valves, garbage disposal, and any water filtration system. These details determine whether a pull-out organizer, stackable bins, or a simpler caddy system will fit.
Build Simple Zones for Faster Cleanup
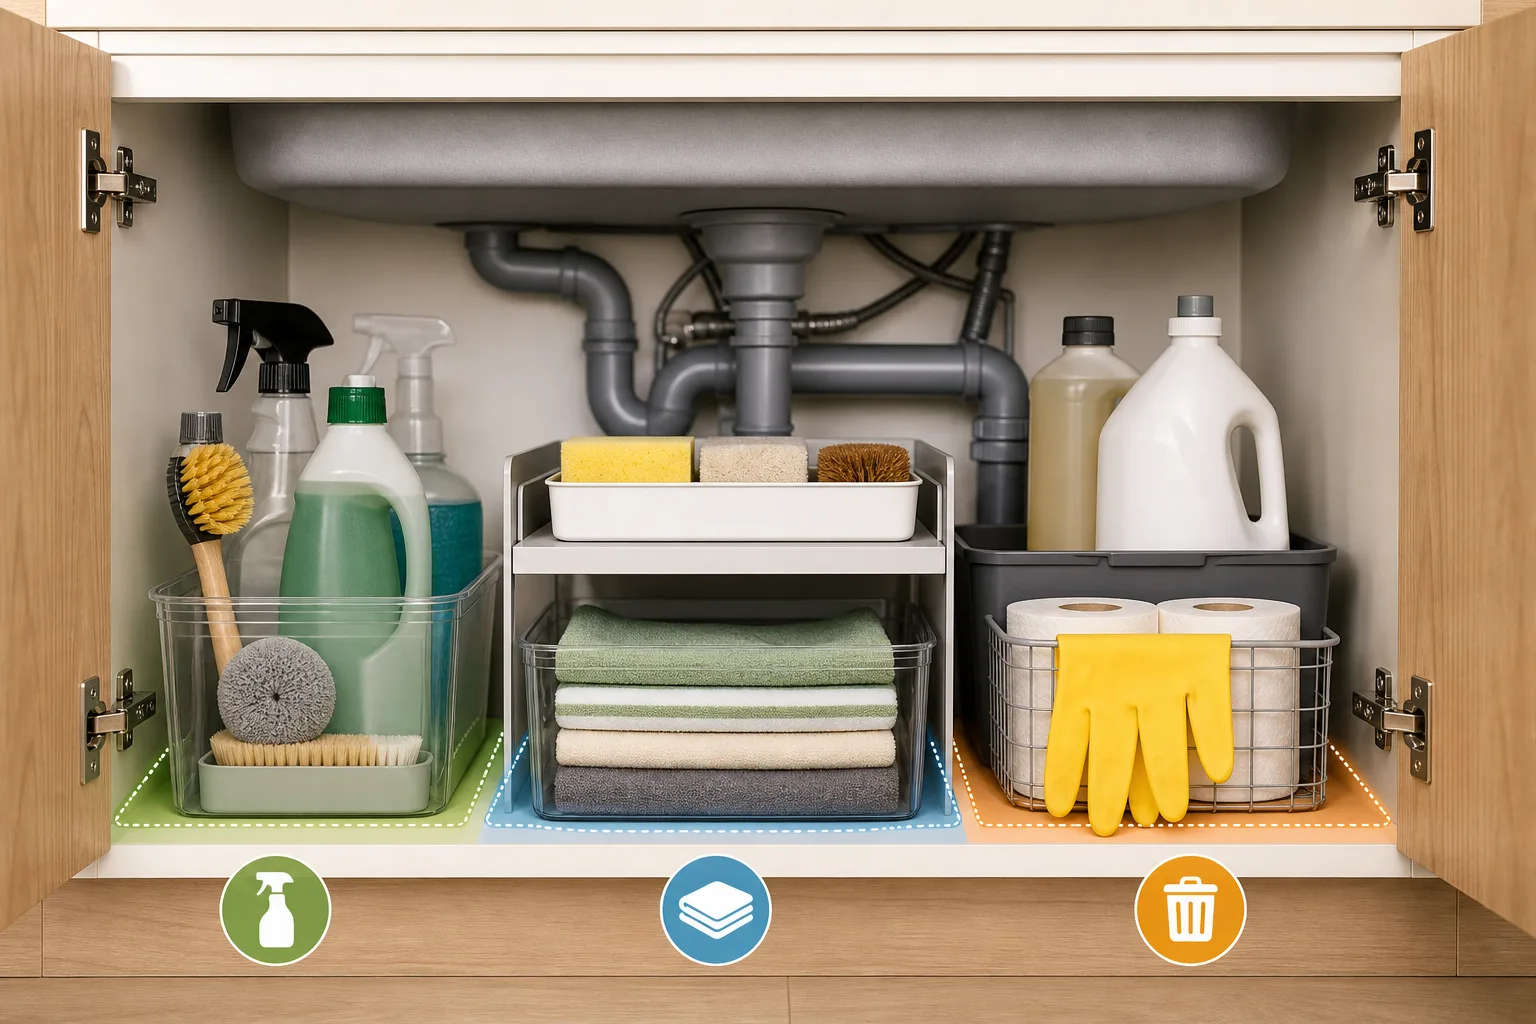
A small cabinet feels more functional when every item has a category. Instead of storing everything together, divide the space into a few practical zones:
- Daily dishwashing: dish soap, dishwasher pods, sponges, brushes, and cleaning cloths.
- Trash and recycling: trash bags, recycling bags, and compostable liners.
- Occasional cleaning: disinfectant, scrub cleaner, gloves, and specialty products.
- Maintenance: a drain brush, small plumber’s tape, or other household essentials you use occasionally.
Keep your daily-use items closest to the cabinet door. Products used less often can go in the back or on an upper shelf. This simple decision prevents the common problem of digging through every bottle just to find dishwasher detergent.
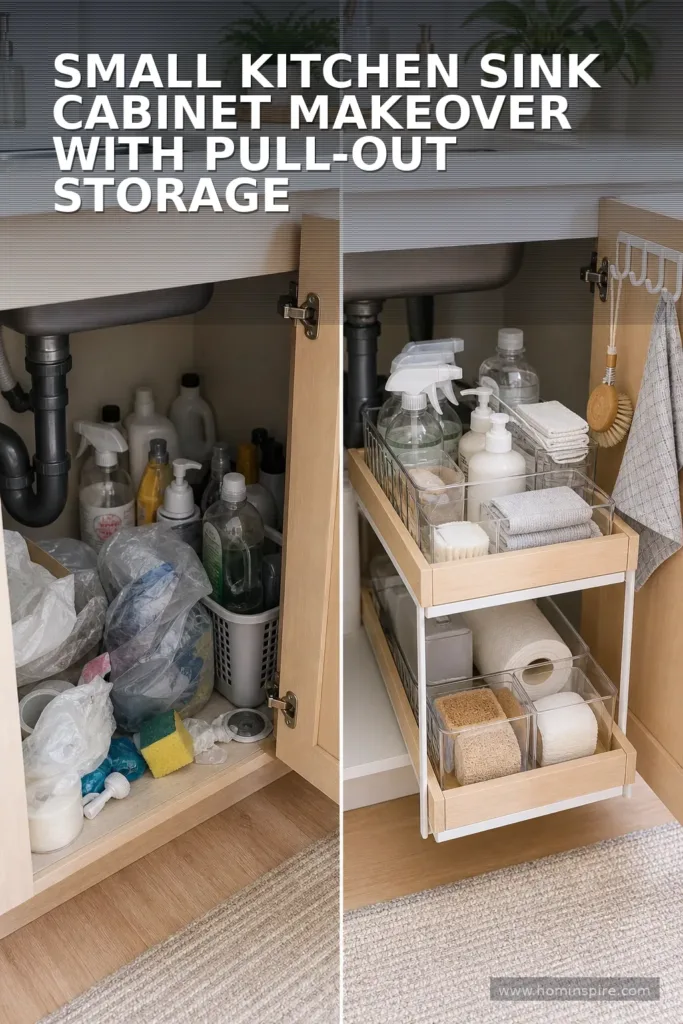
1. Use a Two-Tier Pull-Out Organizer Around Pipes
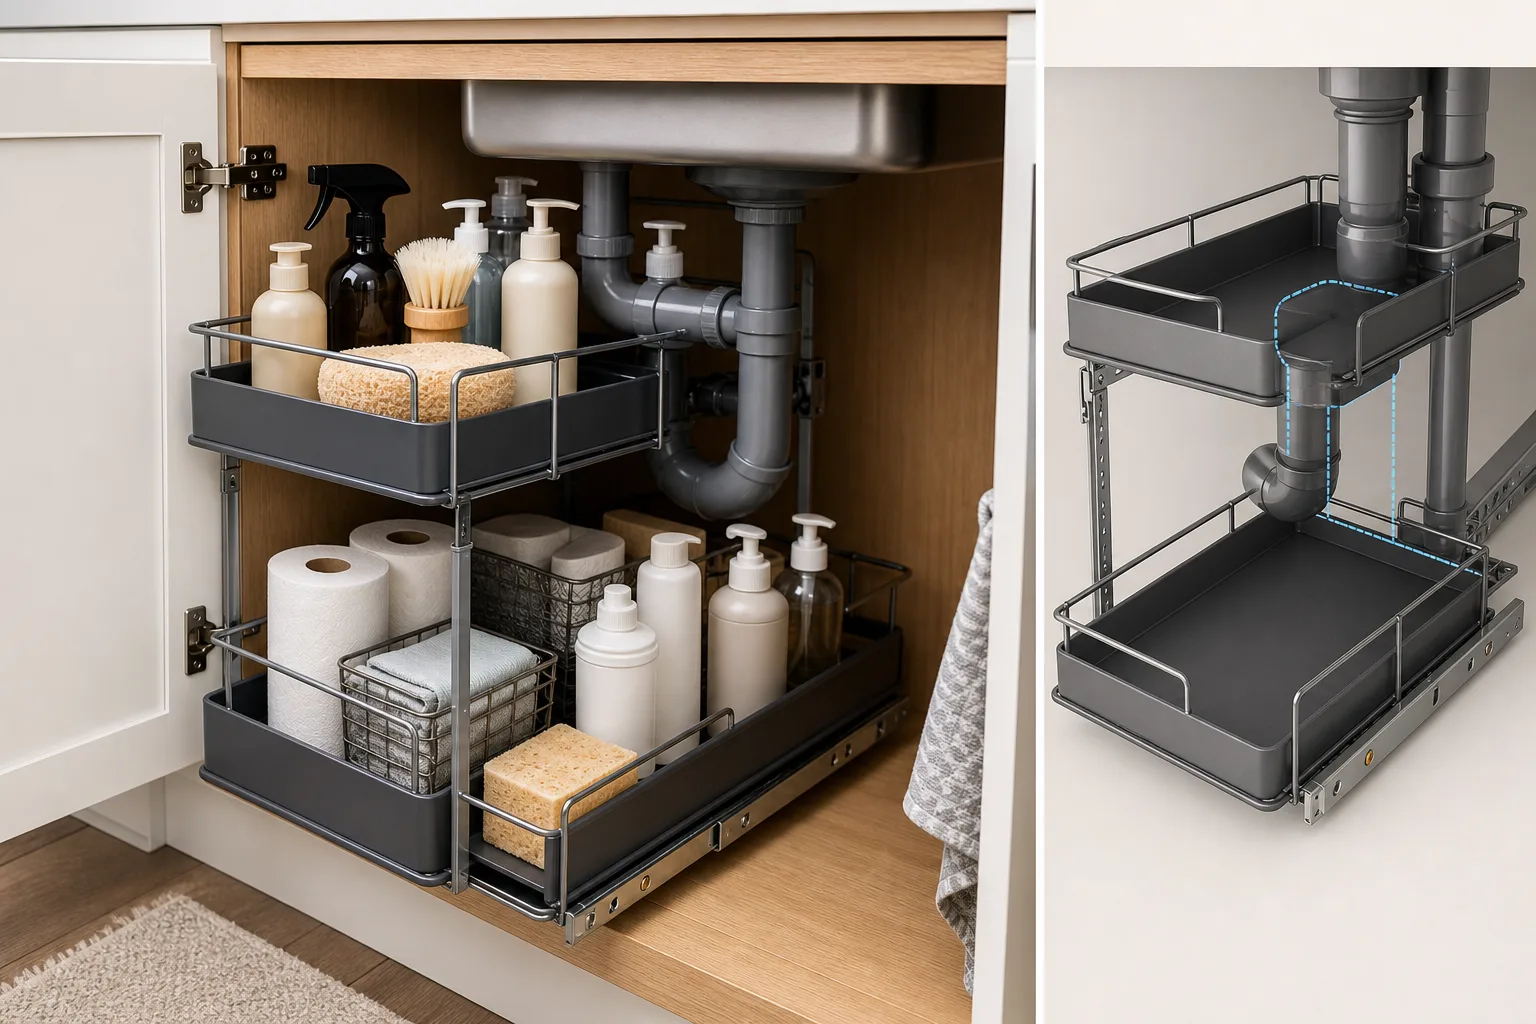
A two-tier pull-out organizer is one of the most effective upgrades for a deep sink cabinet. Look for a model designed with an open center or adjustable sections so it can work around plumbing. The lower tier can hold taller spray bottles, while the upper tier is ideal for sponges, dishwasher tablets, gloves, and small cleaning products.
Choose a pull-out system only after measuring the pipe placement. In especially tight cabinets, a narrow pull-out basket placed beside the plumbing may work better than a full-width unit. Smooth sliding access helps ensure that supplies at the back do not become forgotten clutter.
2. Add a Tension Rod for Spray Bottles
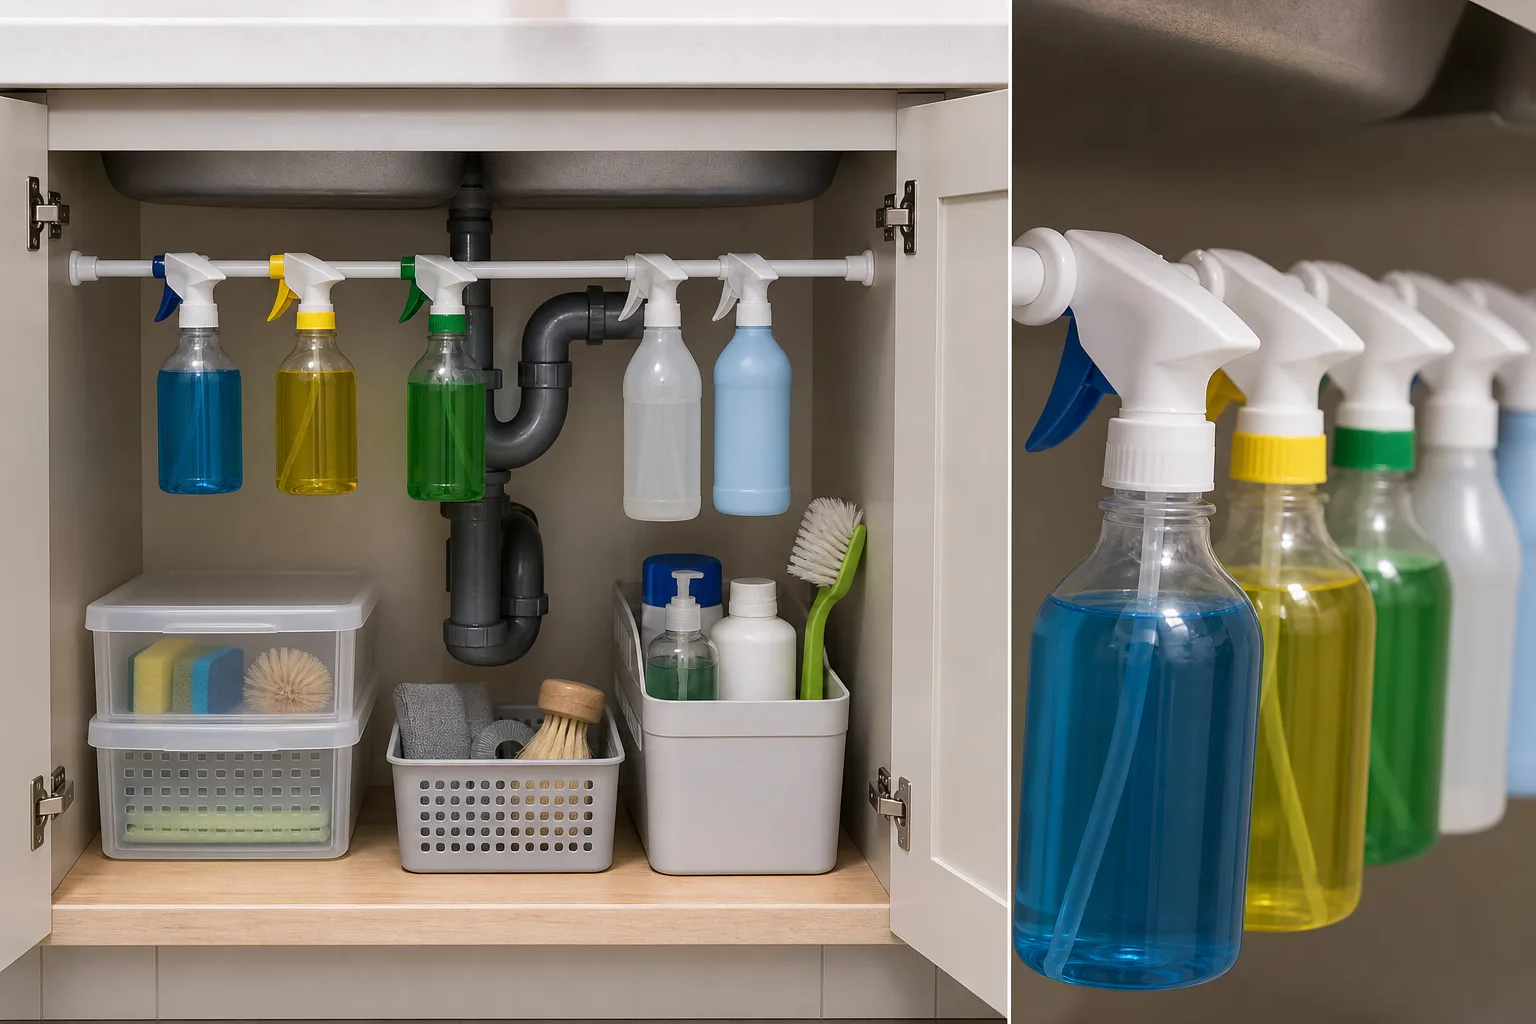
A tension rod is a classic small-space solution because it uses empty vertical space without taking up the cabinet floor. Install a short tension rod across the cabinet near the front, then hang spray bottles by their trigger handles. This keeps bottles upright, easy to grab, and out of the way of bins below.
Use a rust-resistant rod, and avoid overloading it. A few frequently used bottles are usually enough. If your cabinet is especially shallow, hang bottles along one side rather than across the entire width so the center remains open for larger items.
3. Store Trash Bags on a Wall-Mounted Holder
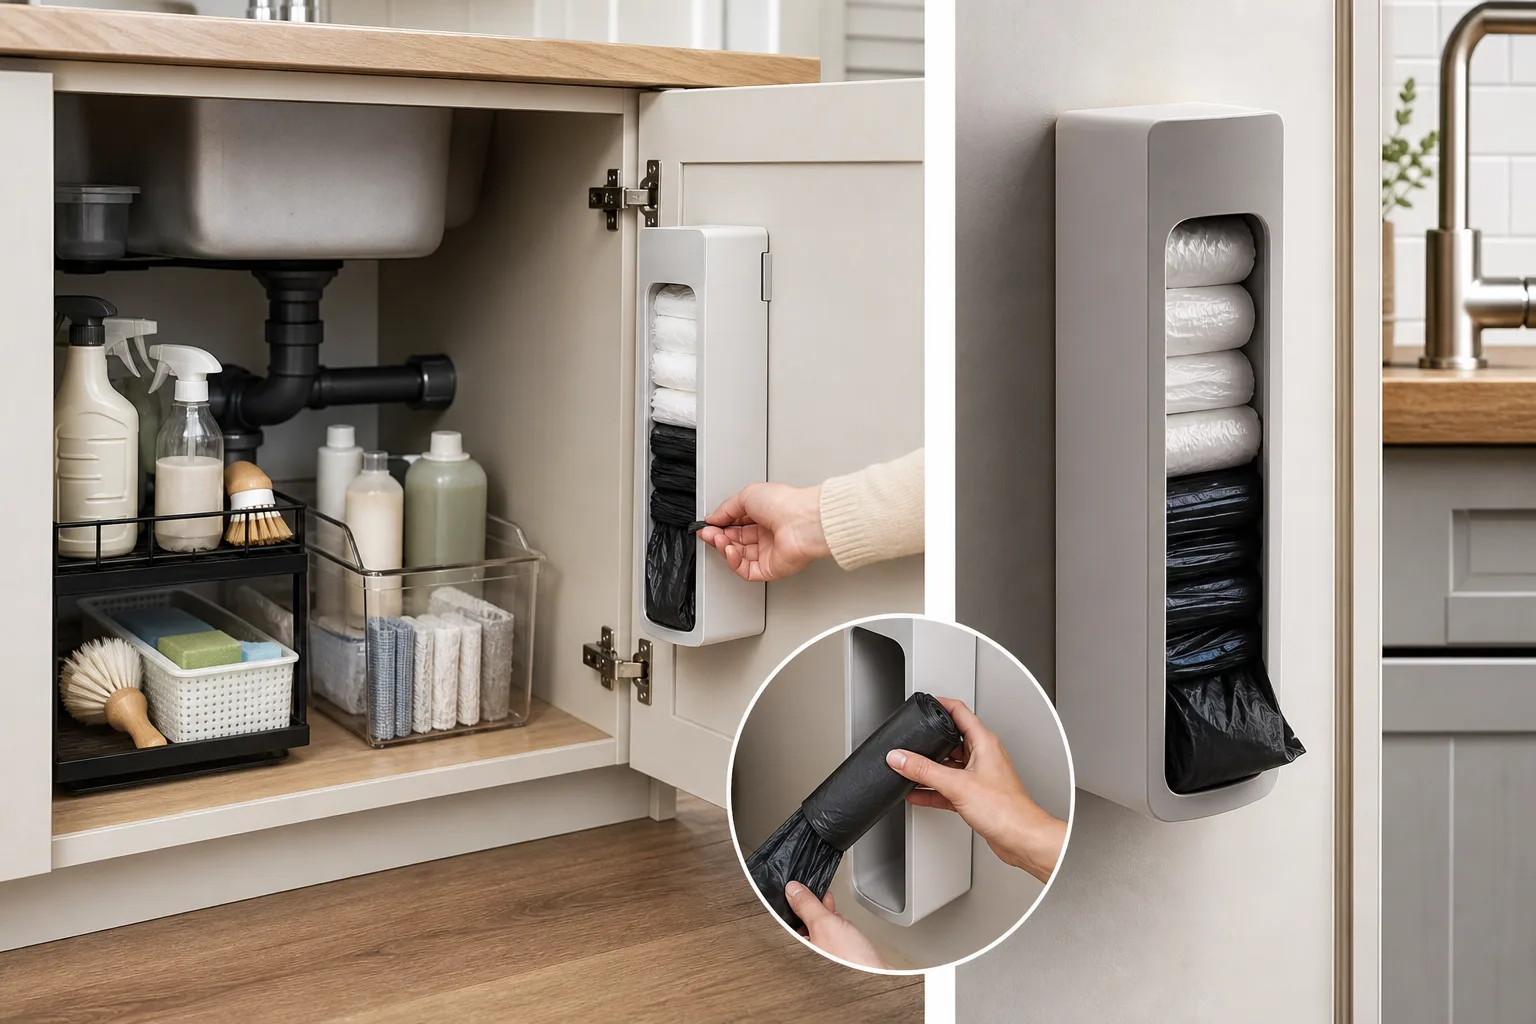
Loose boxes of trash bags waste valuable cabinet room. A compact bag dispenser mounted to the inside cabinet wall or door keeps rolls contained and accessible. You can use an adhesive holder in a rental, provided the surface is clean, dry, and suitable for removable mounting strips.
Another easy option is a simple vertical file-style organizer attached to the door. It can hold flattened boxes of trash bags, sandwich bags, or reusable produce bags. Keeping these supplies on the door frees the cabinet base for bulkier cleaning products.
4. Choose Clear, Narrow Bins Instead of Oversized Baskets
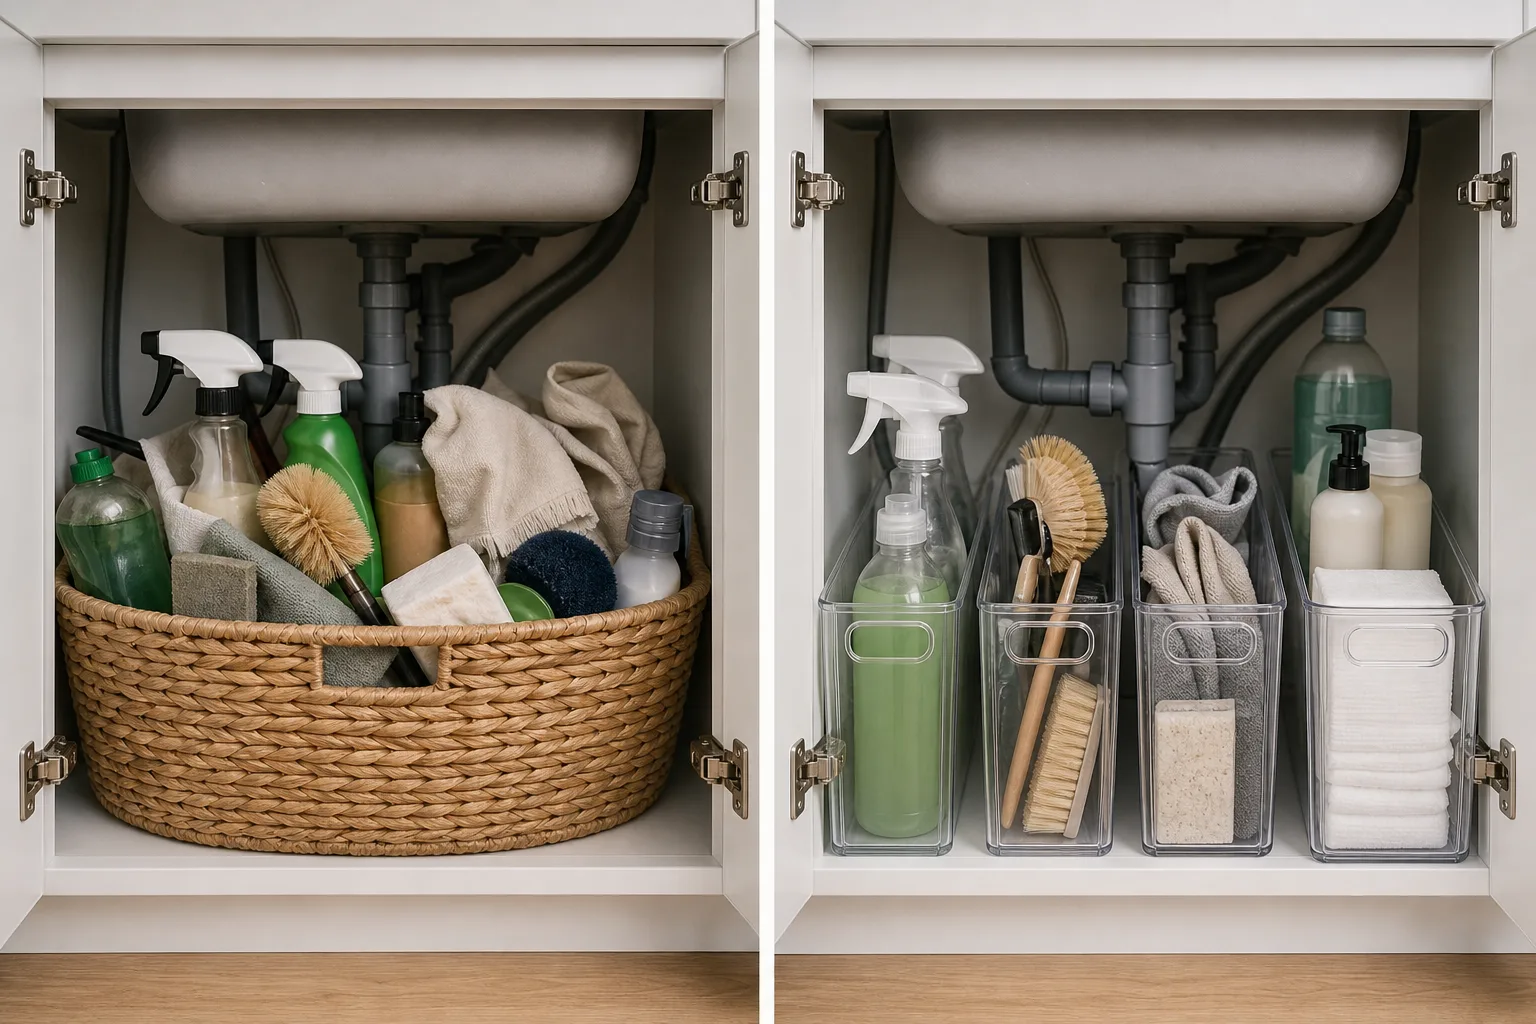
Large baskets may look tidy at first, but they can hide clutter and make a small cabinet harder to use. Narrow clear bins are usually more practical under the sink. They let you see what is inside, fit around pipes more easily, and can be pulled out like drawers.
Use one bin for dishwashing backups, one for cleaning cloths and scrubbers, and another for less frequently used products. Avoid filling every inch. Leaving a little open room makes it much easier to return items after cleaning.
5. Make the Cabinet Door Work Harder
The inside of the cabinet door is often underused, but it is perfect for flat, lightweight items. Add adhesive hooks for rubber gloves, a slim rack for cleaning cloths, or a small caddy for sponges. A door-mounted organizer can also hold a dish brush, bottle brush, or a compact lint roller.
Be mindful of clearance before installing anything. Close the door slowly with the organizer held in place to make sure it will not hit pipes, bottles, or shelves. Keep door storage lightweight so hinges are not strained and adhesive products remain secure.
6. Use a Slim Caddy for Everyday Cleaning Supplies
A portable cleaning caddy is particularly useful in a small kitchen because it keeps your most-used supplies together. Put dish soap, all-purpose cleaner, a scrub brush, and a microfiber cloth in one compact handled bin. When it is time to clean the counters, stovetop, or dining area, you can grab the entire caddy instead of collecting products one by one.
This approach also makes inventory easier. When the caddy starts looking empty, you know exactly what needs to be replaced. For a more streamlined kitchen overall, pair this hidden cleaning setup with these kitchen counter decor ideas without clutter.
7. Add a Small Shelf Above Short Items
The space above short bottles and bins often goes unused. A compact adjustable shelf can create a second level for dishwasher pods, sponges, cleaning tablets, or extra soap. Select a shelf with an open or customizable design that can accommodate pipes.
Do not force a shelf into a cabinet where it blocks shutoff valves. Water valves should remain easy to reach in an emergency. If the plumbing takes up too much room, use stackable bins on the open side of the cabinet instead.
8. Corral Sponges, Brushes, and Cloths Separately
Small wet items are a major source of under-sink mess. Store clean sponges and backup scrubbers in a ventilated bin or shallow drawer organizer. Keep dirty or damp cloths out of the closed cabinet whenever possible so they can dry properly. A sink-side holder or an over-the-door towel bar can be a better place for items that need airflow.
Assigning one small container to replacement sponges, dish brush heads, and cleaning gloves prevents these items from drifting throughout the cabinet. It also helps you avoid buying replacements you already have.
9. Store Dishwasher Pods in a Sealed Container
Dishwasher pods and powder detergents should stay dry and be stored safely away from children and pets. A lidded container placed in an upper pull-out tray or toward the back of the cabinet keeps the package from getting crushed or damp. Label the container clearly, especially if its appearance does not make the contents obvious.
If safety is a concern in your household, consider a child-resistant latch for the cabinet. Organization should make the space convenient, but it should never compromise safe storage practices.
10. Use Lazy Susans Only Where They Can Turn Freely
A small lazy Susan can be helpful for short bottles, scrub cleaners, or bottles of vinegar-based cleaner. It is best used in an open corner where pipes will not block rotation. Choose a low-profile model with a raised edge so bottles stay in place.
Lazy Susans are not ideal for every sink cabinet. In a very narrow area, pull-out bins often provide better access. But in a cabinet with one clear side bay, a turntable can stop small bottles from disappearing behind taller containers.
11. Keep Backstock Limited and Intentional
Small spaces work best when you avoid treating every cabinet as a warehouse. Keep only one backup of essentials such as dish soap, dishwasher detergent, trash bags, and sponges. Store larger bulk purchases elsewhere when possible.
This habit creates breathing room and makes the cabinet easier to maintain. It also prevents chemical products from sitting forgotten for years. If your kitchen lacks pantry or utility storage, explore these hidden pantry ideas for discreet ways to add storage beyond the sink cabinet.
12. Create a Renter-Friendly Setup Without Drilling
Renters can make a major difference under the sink without permanent changes. Tension rods, freestanding bins, removable adhesive hooks, over-the-door racks, and non-slip shelf liners are all practical options. They can be removed at move-out and require little to no alteration to the cabinet.
For adhesive products, follow the manufacturer’s instructions and do not attach them to peeling paint, damp surfaces, or unfinished wood. Test the placement before committing, especially on cabinet doors that need to close around pipes and supplies. Find more temporary solutions in this guide to renter-friendly kitchen storage ideas without drilling and these small kitchen storage ideas for renters.
13. Plan for a Garbage Disposal or Water Filter
A garbage disposal, reverse-osmosis system, or water filter can take up most of the sink cabinet. In that case, do not try to force a full organizer into the remaining space. Work with the narrow zones that are available.
Use a vertical tension rod on the open side, a slim rolling or pull-out bin beside the disposal, and door storage for lightweight supplies. A shallow tray below the plumbing can still protect the cabinet base, while a small caddy can hold the few products you truly need under the sink.
14. Label Bins So Everyone Can Maintain the System
Labels are not just decorative. They make it clear where items belong, which is especially helpful in a shared home. Use simple labels such as “Dishwasher,” “Cleaning,” “Bags,” and “Backups.” Clear categories reduce the chance that family members will toss items into the nearest open spot.
Keep labels short and flexible. A bin labeled “Cleaning” is more useful than one labeled “Bathroom Spray and Stainless Cleaner,” because your supplies may change over time.
15. Follow a Five-Minute Monthly Reset
The best under-sink organization system is one you can maintain quickly. Once a month, take five minutes to wipe up drips, return misplaced items, check your supply levels, and remove empty containers. This small reset prevents a neat cabinet from becoming chaotic again.
Also review the cabinet after seasonal cleaning projects or a large grocery run. Those are the moments when excess products and random supplies tend to accumulate.
A Simple Under-Sink Layout for a Tiny Kitchen
If you are unsure where to begin, use this easy layout as a starting point:
- Cabinet door: trash bag dispenser, gloves, and a slim cloth holder.
- Front left: narrow caddy with daily dishwashing supplies.
- Front right: tension rod with two or three spray bottles.
- Back area: clear bin for backups and occasional cleaners.
- Cabinet base: waterproof liner or shallow leak-catching tray.
This arrangement prioritizes the items you use every day while keeping the plumbing accessible. It is adaptable, affordable, and well suited to apartments and compact homes. If you are improving the entire room, these small kitchen ideas for apartments can help you make the most of every other inch as well.
Common Under-Sink Organization Mistakes to Avoid
- Buying organizers before measuring: pipes and disposals can make standard products unusable.
- Storing too many cleaning products: duplicates create clutter and make leaks harder to notice.
- Blocking shutoff valves: emergency access should always remain clear.
- Using cardboard boxes: they absorb moisture and deteriorate quickly under a sink.
- Putting damp items in closed bins: trapped moisture can lead to odors and mildew.
- Choosing deep opaque containers: supplies get lost and are more likely to be purchased again unnecessarily.
Final Thoughts
Organizing under a kitchen sink is less about finding one perfect product and more about creating a setup that matches your cabinet, plumbing, and daily habits. Start with a clean, measured space. Use vertical storage, narrow pull-out bins, door organizers, and a limited amount of backstock. Then give each item a clear home.
Even the smallest sink cabinet can become a calm, useful part of your kitchen. A few thoughtful changes will make cleaning supplies easier to find, reduce countertop overflow, and help your compact kitchen work more efficiently every day.
Frequently Asked Questions
What is the best way to organize under a kitchen sink in a small space?
Start by measuring around the plumbing, then use a mix of narrow clear bins, a tension rod for spray bottles, and door-mounted storage for lightweight items. Keep daily supplies in front and limit bulk backups.
How do I organize under the sink with a garbage disposal?
Use the open space beside the disposal rather than trying to fill the entire cabinet. A slim pull-out bin, tension rod, cabinet-door rack, and waterproof base tray are usually the most useful options.
What should not be stored under the kitchen sink?
Avoid storing food, medications, paper products, electronics, and items that can be damaged by moisture. Keep harsh chemicals secured and away from children and pets.
How can renters organize under the kitchen sink without drilling?
Choose freestanding bins, tension rods, removable adhesive hooks, cabinet-door organizers, and non-slip liners. These options improve storage without permanent cabinet modifications.
How often should I clean out the cabinet under my kitchen sink?
A quick monthly reset is usually enough. Wipe up moisture, discard empty products, check for leaks, and return items to their labeled zones.
