
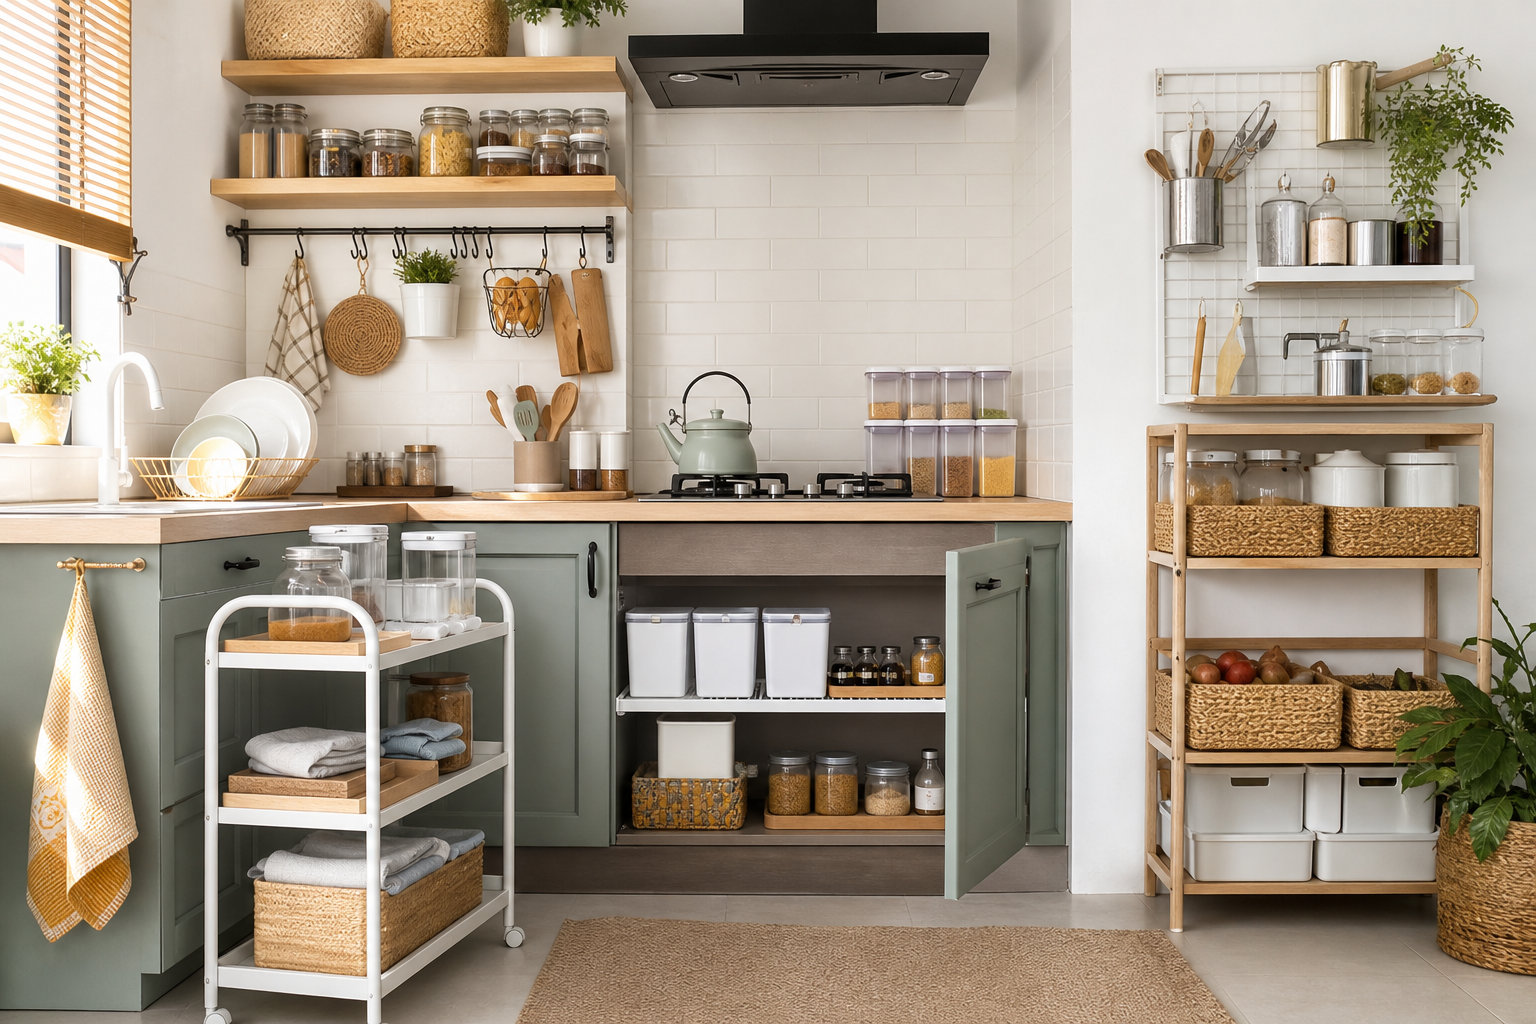
A small kitchen does not need a major renovation to become easier to use. In fact, some of the most effective upgrades cost less than a dinner out: a tension rod under the sink, stackable bins in a cabinet, hooks on an empty wall, or a rolling cart tucked beside the refrigerator.
The key is to make every square inch work harder. Instead of buying more containers at random, start by identifying where clutter builds up, what you reach for most often, and which areas are currently wasted. These small kitchen storage ideas on a budget focus on affordable solutions that improve visibility, accessibility, and daily workflow.
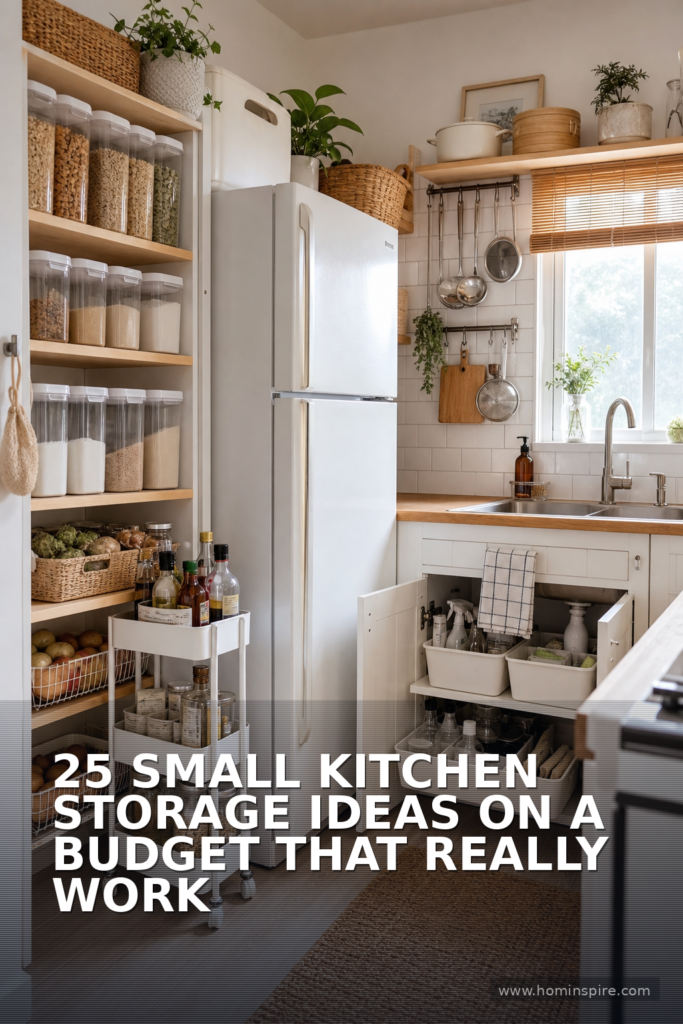
Start With a Quick Kitchen Storage Reset
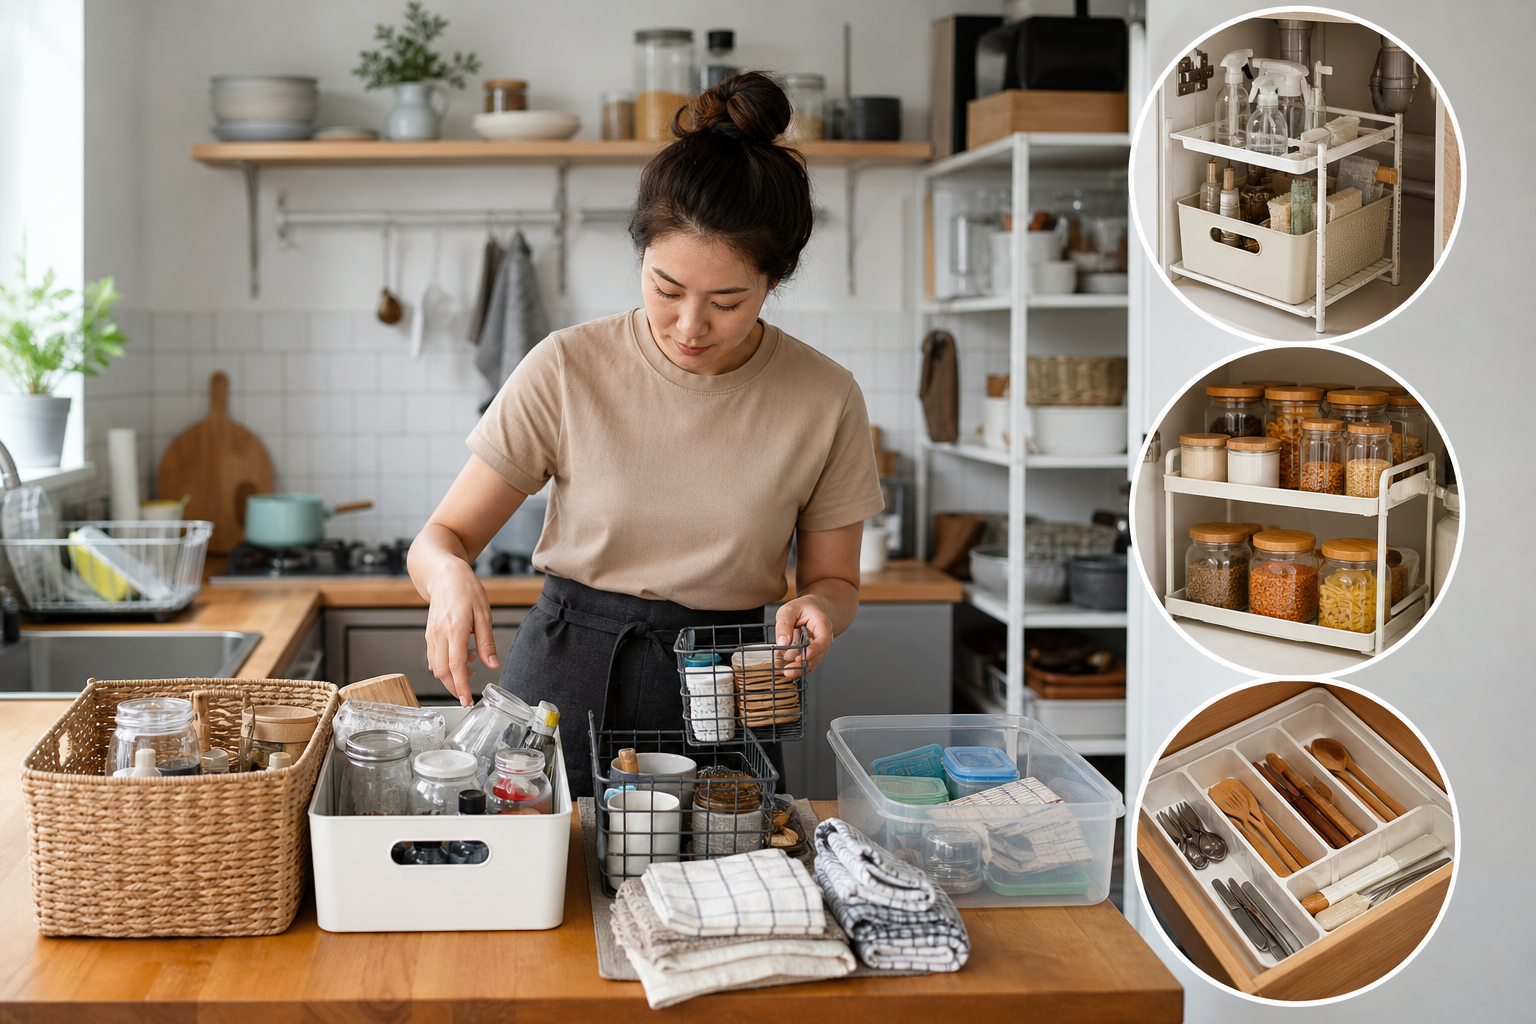
Before adding organizers, take a realistic look at what you own. Storage products can hide clutter, but they cannot solve overfilled cabinets or duplicate tools. Pull out one category at a time—mugs, food containers, spices, utensils, or cleaning supplies—and keep only what you use regularly.
Then measure key spaces. Note the height, width, and depth of your cabinets, drawers, pantry shelves, the gap beside your refrigerator, and the area under the sink. A $10 shelf riser is only useful if it fits. Measuring first prevents wasteful purchases and helps you choose simple organizers that solve a specific problem.
Finally, prioritize zones. Keep cooking tools near the stove, food-storage containers near the fridge or prep area, and everyday dishes close to the dishwasher. This small change can create more practical storage without buying anything.
1. Add Shelf Risers Inside Cabinets
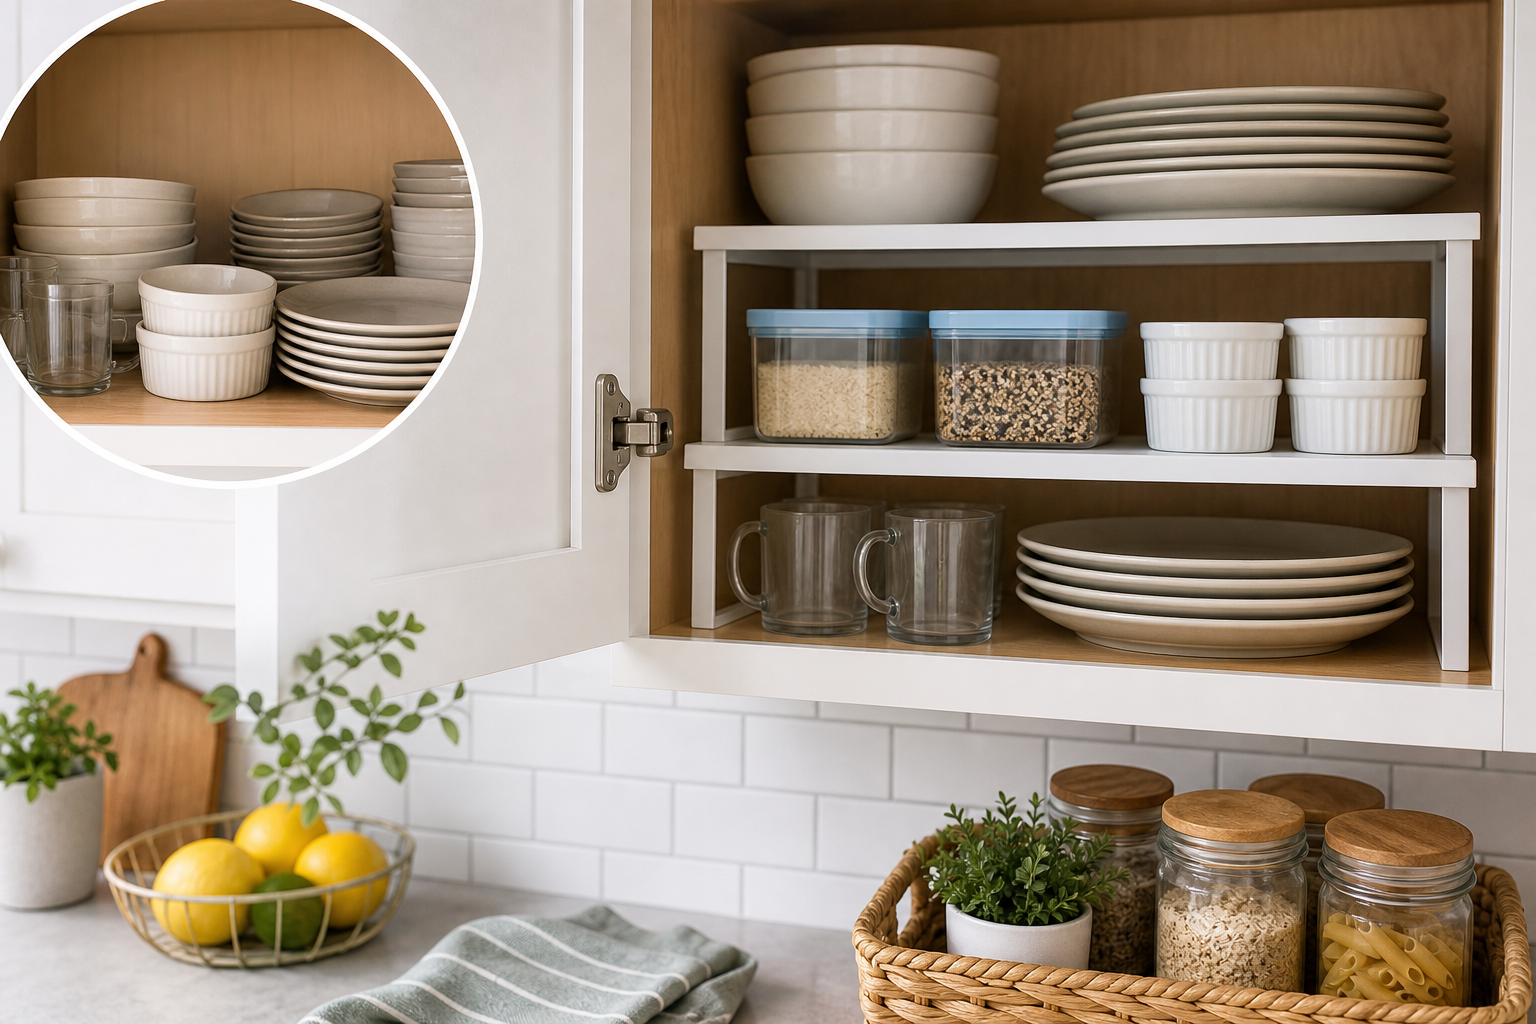
Cabinet shelves often waste valuable vertical space. Inexpensive wire or plastic shelf risers create a second level for plates, bowls, mugs, canned goods, or pantry staples. Rather than stacking everything in tall, unstable piles, you can see and reach each item easily.
Use a riser for everyday dishes in an upper cabinet or for canned food in a lower cabinet. Choose an open design so it does not make a dark cabinet feel more crowded. This is one of the simplest small kitchen storage ideas on a budget because it requires no installation.
2. Use Clear Bins to Group Pantry Items
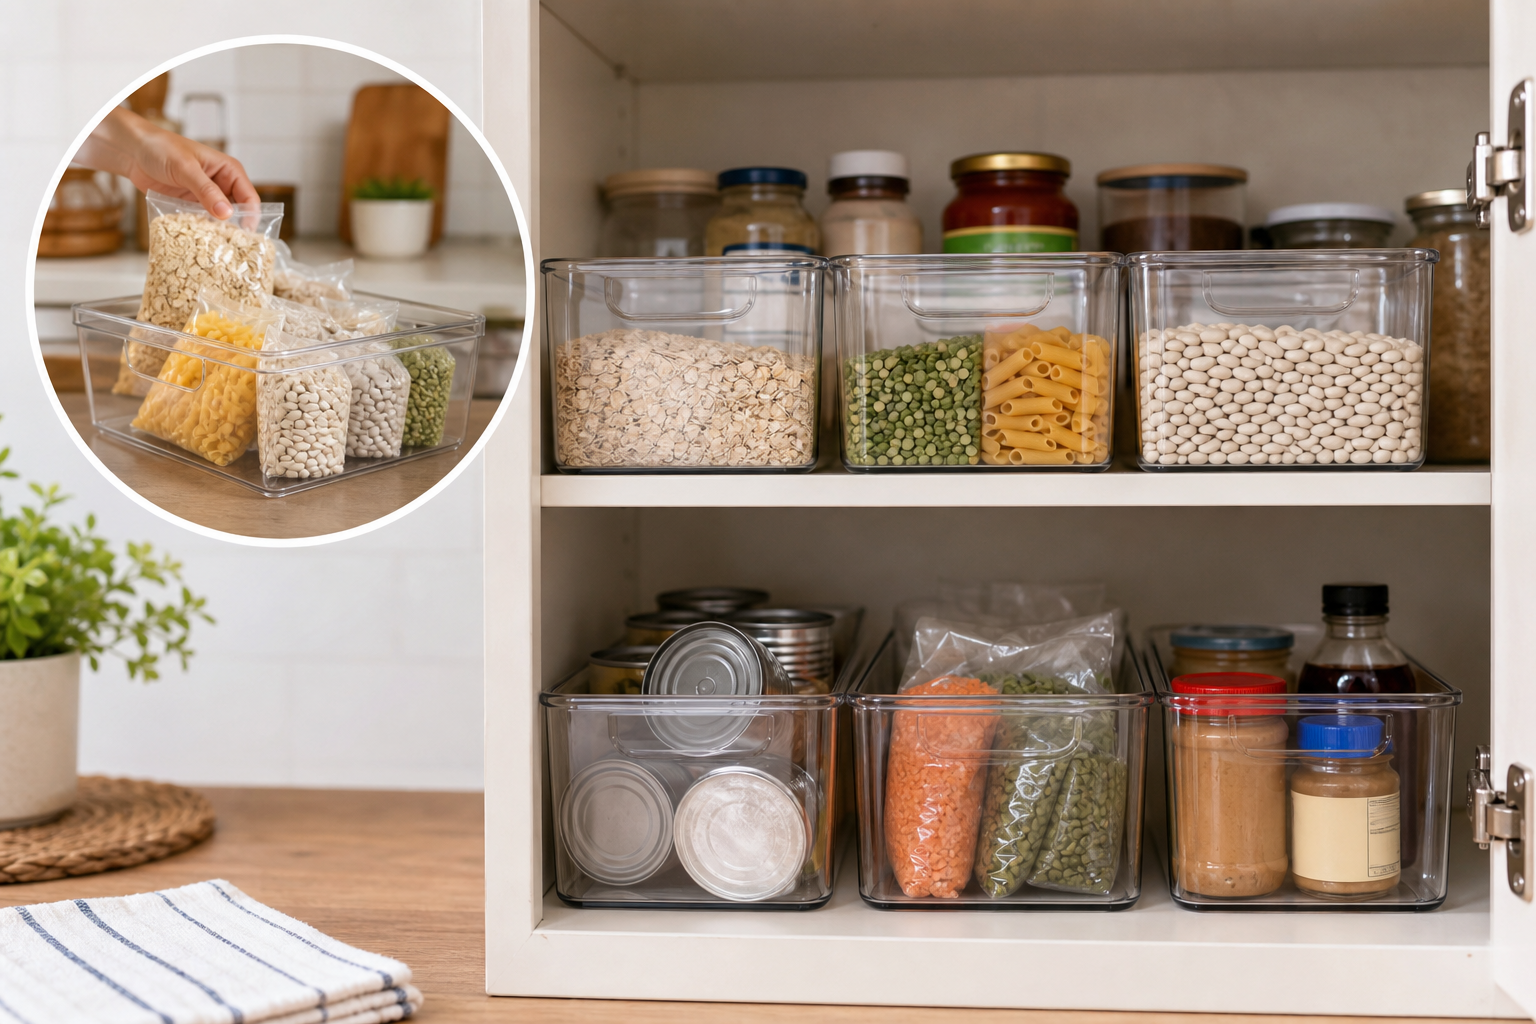
Clear bins make deep shelves far more manageable. Group similar items together, such as breakfast foods, baking supplies, snack packs, pasta, or sauce packets. When you need something, pull out the bin instead of digging behind several rows of products.
You do not need matching designer containers. Affordable clear shoebox-style bins, recycled plastic baskets, or dollar-store bins work well. Label the front with removable tape or simple adhesive labels so everyone in the household knows where things belong.
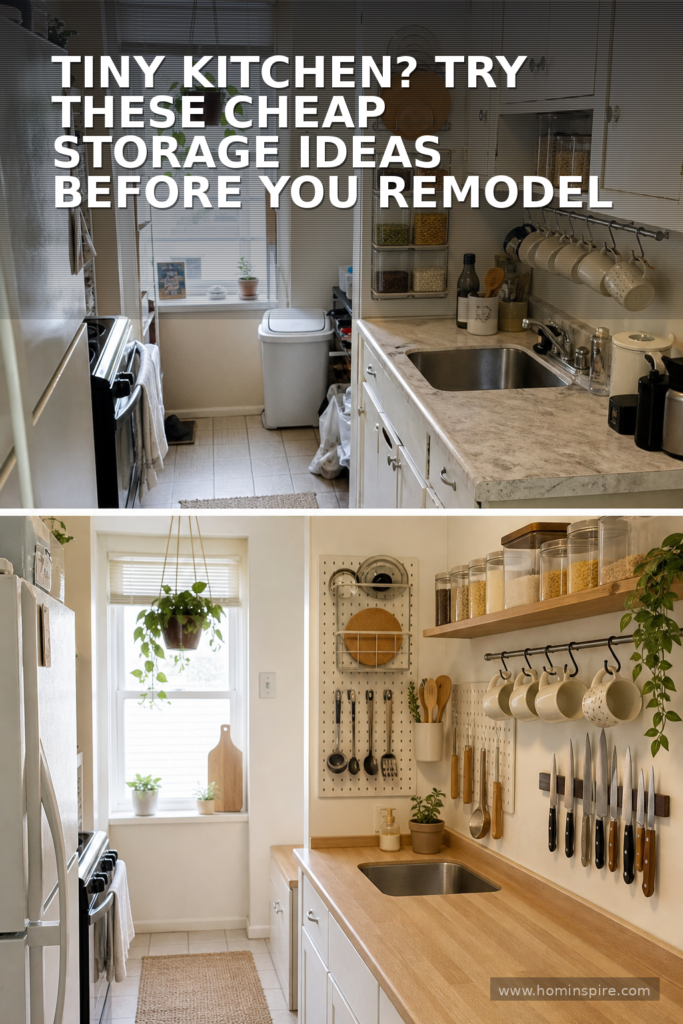
3. Install Hooks on Walls, Cabinet Sides, or Doors
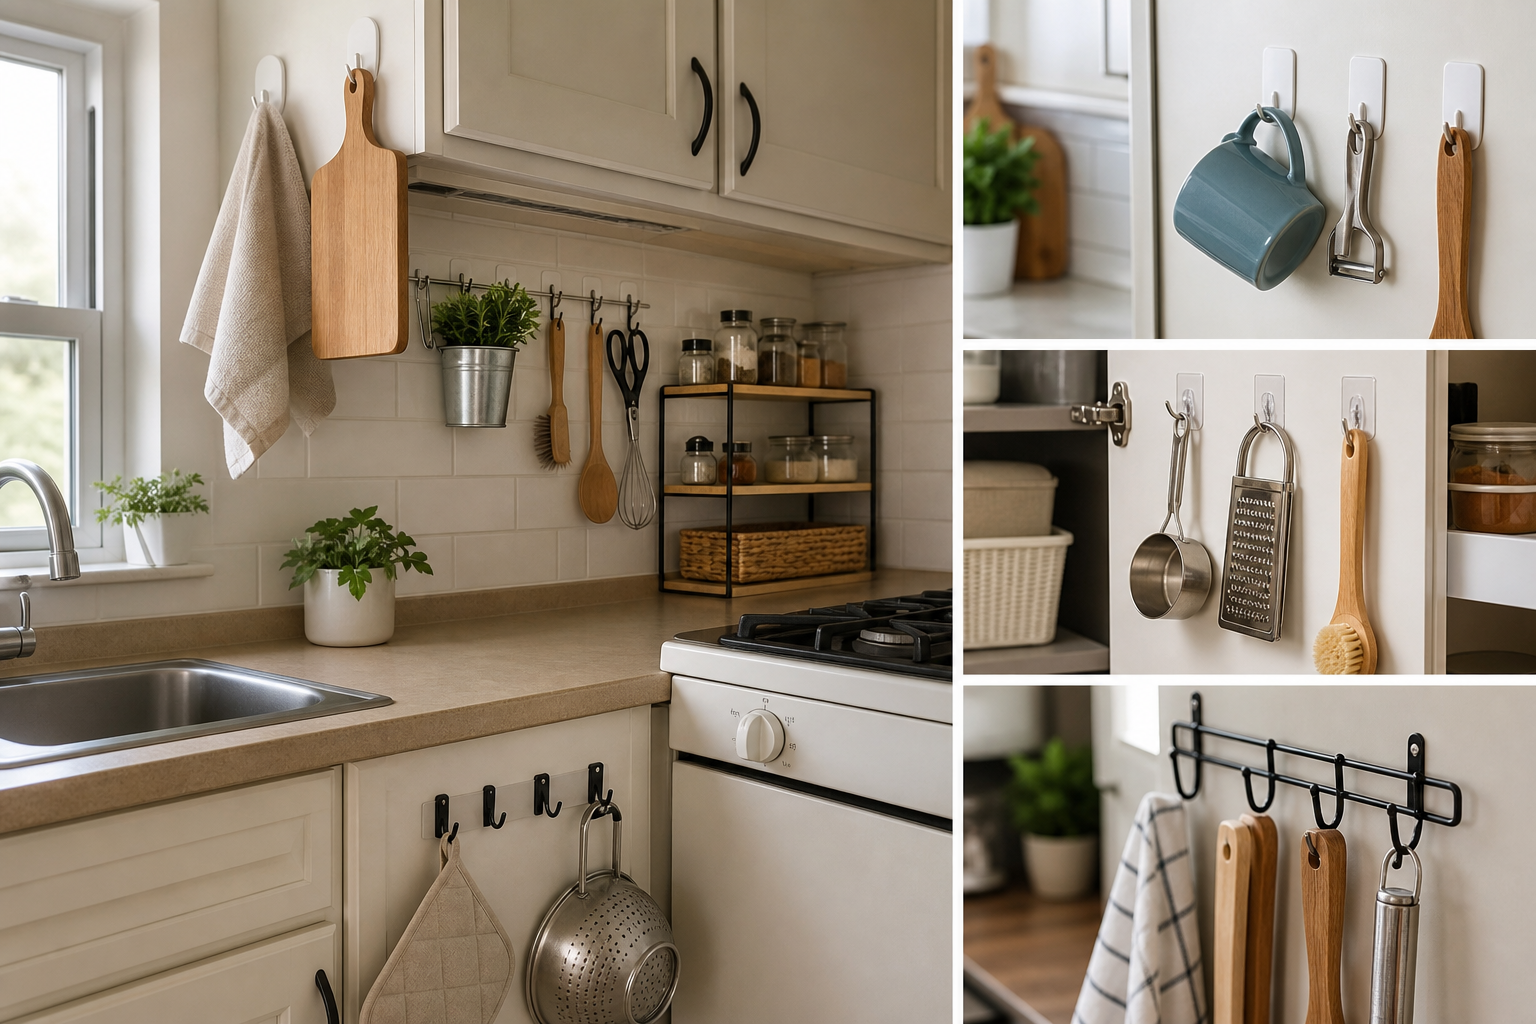
Hooks are inexpensive, flexible, and ideal for items that otherwise take up drawer or counter space. Adhesive hooks can hold oven mitts, measuring cups, lightweight pans, dish towels, reusable shopping bags, or a small dustpan and brush.
Consider the side of a cabinet, the inside of a pantry door, or the narrow strip of wall beside the fridge. Avoid placing heavy cast-iron cookware on adhesive hooks; use securely mounted wall hooks or a stud-mounted rail for heavier items.
4. Turn the Inside of Cabinet Doors Into Storage
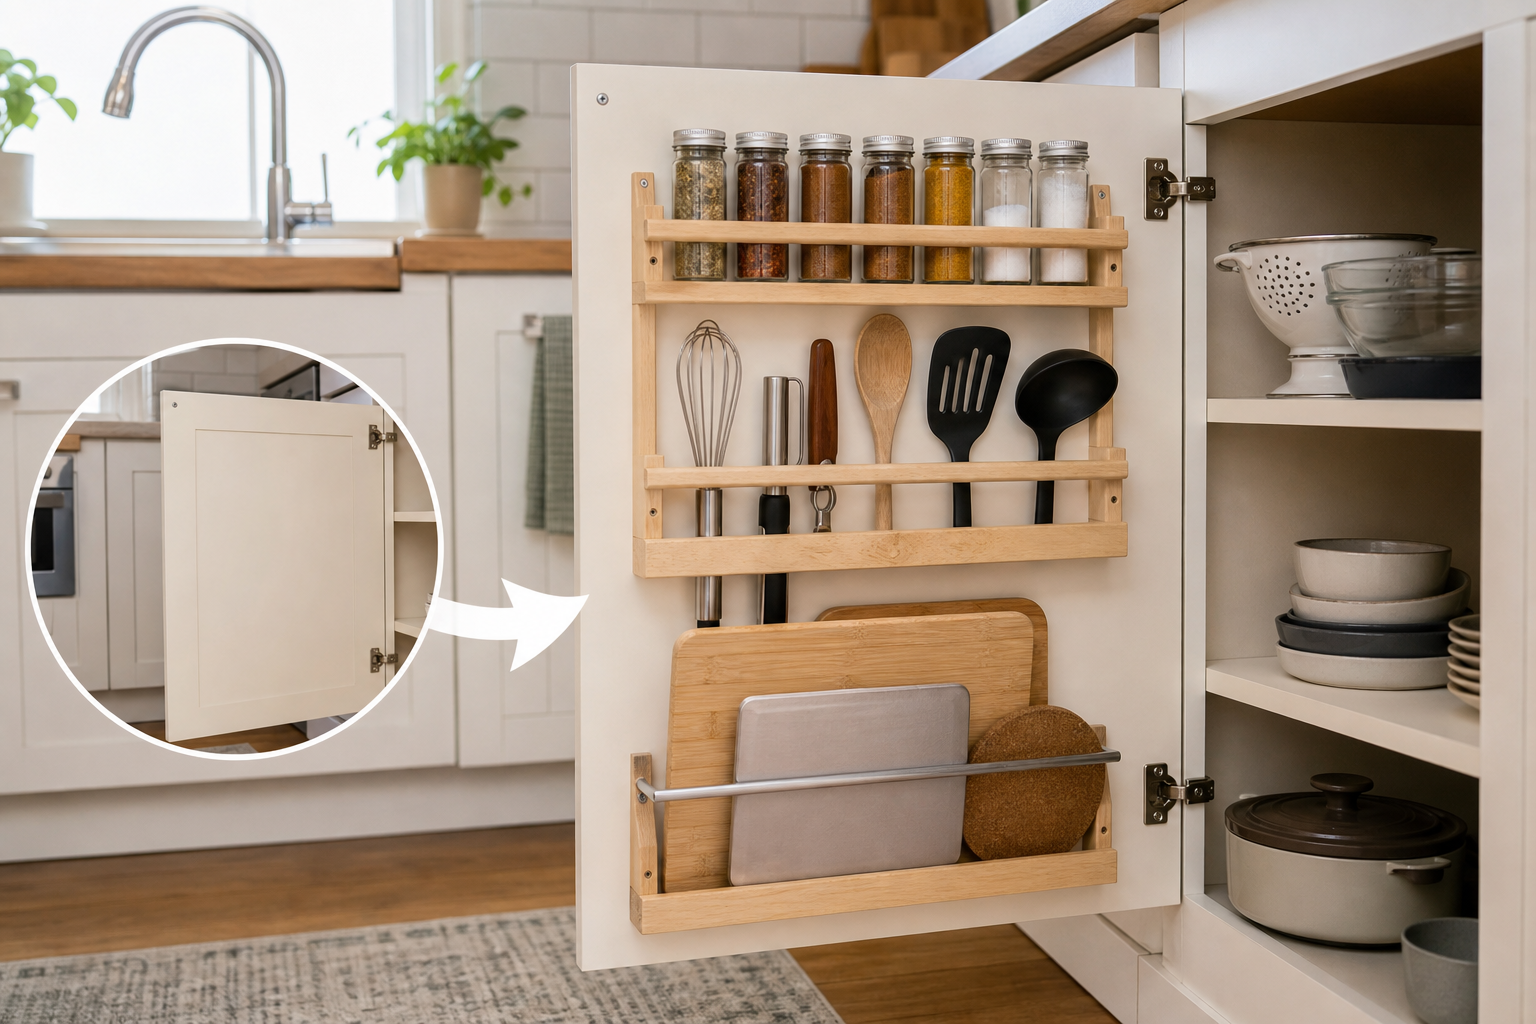
Cabinet doors are often overlooked, yet they can hold many slim, lightweight kitchen essentials. Add a narrow rack for wraps and storage bags, small baskets for cleaning cloths, or adhesive clips for pot lids. A door-mounted organizer can also keep spices, tea bags, or food-container lids visible.
Measure carefully before installing anything. Close the door slowly to make sure the organizer will not hit shelves or cabinet contents. Slim organizers are best for this area.
5. Use a Tension Rod Under the Sink
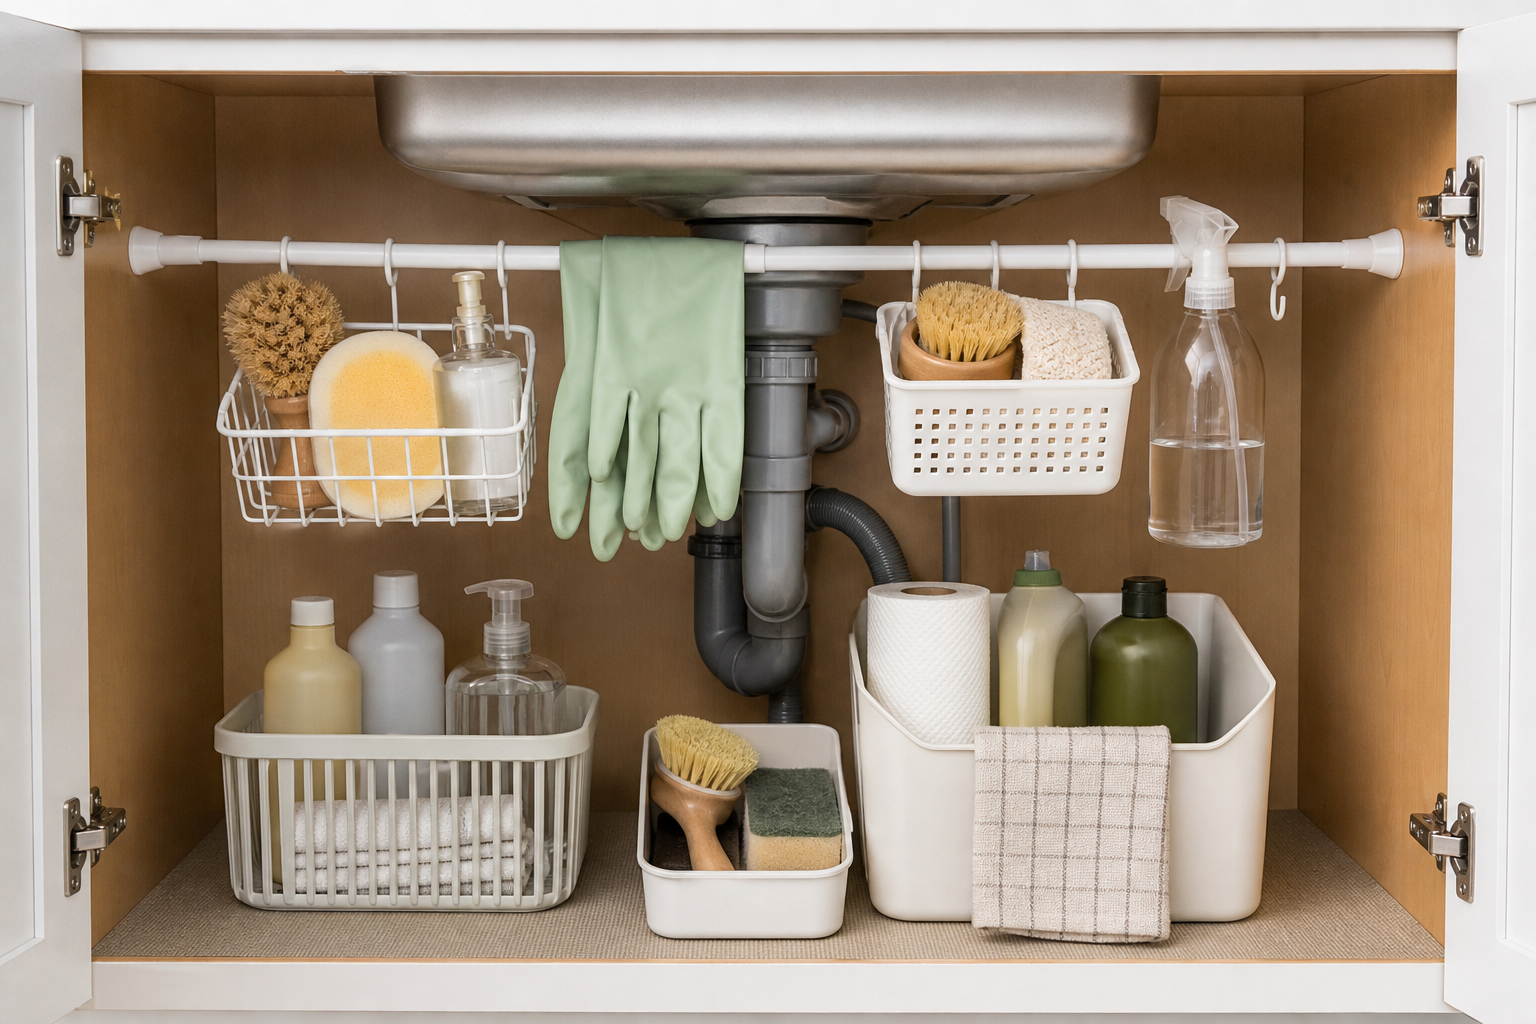
The under-sink cabinet is notorious for becoming a jumble of bottles, sponges, and grocery bags. A low-cost tension rod instantly creates hanging space for spray bottles. Slide the spray triggers over the rod and place a small bin underneath for sponges, dishwasher tablets, and extra cloths.
This setup keeps cleaning products off the cabinet floor and makes leaks easier to spot. If pipes limit the space, choose an adjustable rod and position it toward the front of the cabinet.
6. Create a DIY Lid Organizer
Food-container lids are easy to lose and difficult to stack. Instead of buying a specialized organizer, use a small plastic bin, file sorter, dish rack, or a few tension rods inside a drawer. Store lids vertically by size so you can find a match without emptying the whole drawer.
For pot and pan lids, a wire file holder placed inside a cabinet can work surprisingly well. It keeps lids upright, reduces clanging, and costs much less than a custom pull-out system.
7. Maximize Drawer Space With Simple Dividers
Messy drawers make a small kitchen feel less functional than it is. Adjustable drawer dividers, inexpensive trays, or repurposed small boxes can create dedicated homes for utensils, foil, bag clips, and gadgets. The goal is not perfection; it is making items easy to find and easy to put away.
Use shallow trays for frequently used utensils and deeper containers for less-used tools. If a drawer holds oversized utensils, place them diagonally or use a long narrow bin to prevent them from shifting around.
8. Store Pots and Pans Vertically
Stacked cookware wastes time because you must lift several pieces to reach the one at the bottom. Store pans vertically using a wire rack, cooling rack, or inexpensive cabinet organizer. This protects surfaces, improves access, and makes a lower cabinet feel much larger.
If vertical storage is not possible, nest cookware by size and place a cloth, paper towel, or inexpensive pan protector between pieces. Keep only the pots and pans you use regularly in the kitchen; specialty pieces can be stored elsewhere if needed.
9. Add a Rolling Utility Cart
A slim rolling cart is useful in kitchens with little or no pantry space. Choose one that fits beside the refrigerator, at the end of a cabinet run, or in a nearby dining area. Use it for produce, snacks, coffee supplies, baking ingredients, or small appliances.
The advantage of a cart is flexibility. Roll it near your work area while cooking, then tuck it away. Look for a basic metal or plastic cart with locking wheels rather than an expensive kitchen-specific model.
10. Use the Space Above Cabinets Wisely
If your upper cabinets do not reach the ceiling, the open area above them can store infrequently used items. Use matching bins or baskets for seasonal serving pieces, extra paper goods, or specialty bakeware. Labels are essential because this storage is less accessible.
Avoid placing loose items above cabinets, where grease and dust can collect. Closed containers keep belongings cleaner and make the space look intentional instead of cluttered.
11. Create a Simple Coffee or Breakfast Station
Small kitchens benefit from grouping items by task. A tray, basket, or section of counter can become a coffee station with mugs, coffee, filters, sweeteners, and a small machine. Another bin can hold toaster supplies, oatmeal, or grab-and-go breakfast items.
Stations reduce the need to open multiple cabinets during busy mornings. They also reveal which items are rarely used and can be moved to less accessible storage.
12. Store Spices in a Drawer or Door Rack
Spices can consume an entire cabinet shelf if they are not organized. If you have a shallow drawer near the stove, use inexpensive drawer inserts to lay spice jars label-side up. A door-mounted rack is another practical option for a narrow cabinet.
Keep only spices you actually use. Check expiration dates once or twice a year, and buy smaller containers for seasonings that are used occasionally. This saves both storage space and grocery money.
13. Add a Magnetic Strip for Metal Tools
A magnetic knife strip frees up counter space and drawer space while keeping knives accessible. It can also hold metal measuring spoons, kitchen shears, and small metal tools. Install it safely away from children and out of busy walkways.
If wall mounting is not an option, consider a magnetic strip on the side of a refrigerator for lightweight tools or spice tins. Always check that the surface and magnets are strong enough for the items you plan to store.
14. Use Baskets for Produce and Paper Goods
Open baskets are an affordable way to organize potatoes, onions, snacks, tea towels, and paper napkins. Wire baskets encourage airflow for produce, while fabric or plastic baskets are useful for packaged items. Place them on shelves, the top of the fridge, or a cart.
Do not store onions and potatoes together for long periods, since they can cause each other to spoil faster. Keep produce baskets away from direct heat and sunlight when possible.
15. Make Use of the Refrigerator Sides
The side of a refrigerator can become valuable storage if it is exposed. Use strong magnetic hooks for towels, potholders, or lightweight grocery lists. Magnetic baskets can hold pens, coupons, takeout menus, or small kitchen supplies.
Keep this area visually simple. One or two useful organizers can help; too many magnets can make a small kitchen appear busier and more cluttered.
16. Use Stackable Food Containers—But Keep Them Simple
Decanting every pantry item into matching containers can be expensive and time-consuming. A budget-friendly approach is to use stackable containers only for foods that benefit most from them, such as flour, sugar, cereal, rice, pasta, and snacks.
Square or rectangular containers use shelf space more efficiently than round ones. Reuse sturdy jars for dry goods when appropriate, but label them clearly and include the expiration date if you discard the original packaging.
17. Hang a Pegboard for Flexible Wall Storage
A small pegboard can turn an unused wall into adaptable storage for utensils, colanders, measuring cups, and lightweight pans. Unlike fixed shelves, hooks can move as your needs change. This is particularly helpful in rentals if you use removable mounting options approved for your wall type.
Keep the arrangement edited. A pegboard should hold attractive, frequently used tools—not every gadget you own. Too many hanging items can make a compact kitchen feel chaotic.
18. Use a Narrow Gap Organizer
The few inches between a refrigerator and wall or cabinet can be surprisingly useful. A slim pull-out organizer can hold canned goods, spices, oils, cleaning supplies, or reusable bags. Measure the gap at the front and back, since walls and appliances are not always perfectly aligned.
If a store-bought pull-out cart is outside your budget, use a narrow wheeled bin or a simple basket that can slide into the space.
19. Corral Small Appliances
Small appliances can overwhelm limited counter space. Decide which ones are used daily and deserve a permanent spot. Store the rest in a lower cabinet, on a sturdy shelf, or in a nearby closet. Use a bin for their cords and accessories so they stay together.
A tray beneath a toaster or coffee maker can visually define the area and make cleaning easier. It also prevents several appliances from spreading across the entire counter.
20. Add an Over-the-Door Organizer
If your kitchen has a pantry door, utility closet door, or nearby hall closet, an over-the-door organizer can add substantial storage without taking up floor space. Use it for snacks, spices, wraps, cleaning supplies, or lunch-packing items.
Choose a model that fits the door thickness and does not interfere with closing. For safety, avoid storing glass jars or very heavy items high on the door.
21. Keep Countertops Mostly Clear
Clear counters make a small kitchen look bigger and give you room to prepare meals. Try to limit permanent countertop items to daily essentials, such as a coffee maker, utensil crock, or cutting board. Move decorative items and rarely used appliances elsewhere.
When an item has no obvious home, do not automatically leave it on the counter. Ask whether it belongs in a drawer, a cabinet bin, a wall hook, or outside the kitchen entirely.
22. Repurpose Everyday Items as Organizers
Many low-cost storage solutions are already in your home. Use a magazine holder for foil and plastic wrap, a desk file sorter for cutting boards, a shower caddy for cleaning supplies, or small jars for packets and baking decorations. Shoe boxes can become drawer organizers when covered with contact paper or left plain.
Repurposing works best when the item is sturdy, washable, and correctly sized. It is a practical way to test an organization system before investing in a more permanent solution.
23. Label for Easy Maintenance
Labels are not only for appearance. They make it easier to maintain a system, especially in shared kitchens. Label bins by category rather than by overly specific item: “Baking,” “Snacks,” “Lunch Supplies,” or “Tea and Coffee.” Broad labels allow the system to adapt as groceries change.
Use removable labels or painter’s tape first. Once you know the setup works, upgrade to labels you like if desired.
24. Store Less-Used Items Outside the Prime Zone
Prime kitchen storage means easy-to-reach shelves, drawers, and cabinets between waist and eye level. Reserve this space for everyday plates, cookware, cooking tools, and staples. Put holiday serving dishes, large roasting pans, duplicate mugs, and specialty appliances on higher shelves or in another storage area.
This approach costs nothing and often creates immediate breathing room. In a small kitchen, convenience matters more than storing everything in the closest cabinet.
25. Build a Budget Storage Plan One Zone at a Time
It is tempting to buy many organizers at once, but that can create a new kind of clutter. Instead, choose one problem area each week. For example, start with the under-sink cabinet, then organize food-container lids, then tackle spices. Live with each solution for a few days before buying more.
A practical budget might include a few bins, shelf risers, drawer dividers, hooks, and labels. Focus on tools that are adjustable, reusable, and easy to move if you rearrange your kitchen or move to a new home.
How to Make Small Kitchen Storage Look Intentional
Function comes first, but visual simplicity can make a compact kitchen feel calmer. Choose one or two bin colors, use consistent labels, and avoid overfilling open shelves. Put the least attractive supplies behind cabinet doors or inside opaque baskets.
Leave a little empty space whenever possible. A shelf packed to the edge may technically hold more, but it is harder to use and maintain. The best storage system is one you can reset in seconds after cooking or unloading groceries.
Final Thoughts
The best small kitchen storage ideas on a budget are not necessarily the most elaborate. They are the ones that fit your habits, use overlooked space, and make daily tasks easier. Start with decluttering, organize items by activity, and add inexpensive tools only where they solve a real problem.
With a few targeted changes—vertical racks, cabinet-door storage, clear bins, hooks, and a rolling cart—you can create a kitchen that feels more spacious, organized, and enjoyable to use without paying for custom cabinetry.
Frequently Asked Questions
What is the cheapest way to add storage to a small kitchen?
The cheapest options are decluttering, rearranging items by use, repurposing boxes or file holders, and using adhesive hooks. After that, inexpensive shelf risers, clear bins, tension rods, and drawer dividers provide a lot of value for a small cost.
How can I organize a small kitchen with no pantry?
Use cabinet bins to create pantry-like categories, add shelf risers for vertical space, use a rolling cart for overflow, and consider an over-the-door organizer. Group dry goods by category so you can quickly see what you have.
Where should I store pots and pans in a tiny kitchen?
Store frequently used cookware in a lower cabinet near the stove. Use a vertical rack to separate pans, or nest them by size with protectors between them. If cabinet space is limited, hang lightweight pans on a secure wall rail.
How do I keep small kitchen counters clear?
Keep only daily-use appliances and tools on the counter. Give every other item a specific home in a drawer, cabinet, wall organizer, or cart. Using trays for coffee or cooking essentials can also make necessary counter items look contained.
Are clear containers worth it for a small kitchen?
Clear containers are worth using selectively. They are especially helpful for dry staples and deep pantry shelves because they improve visibility and stack efficiently. You do not need to decant every item; use them for categories that regularly become messy or hard to access.
